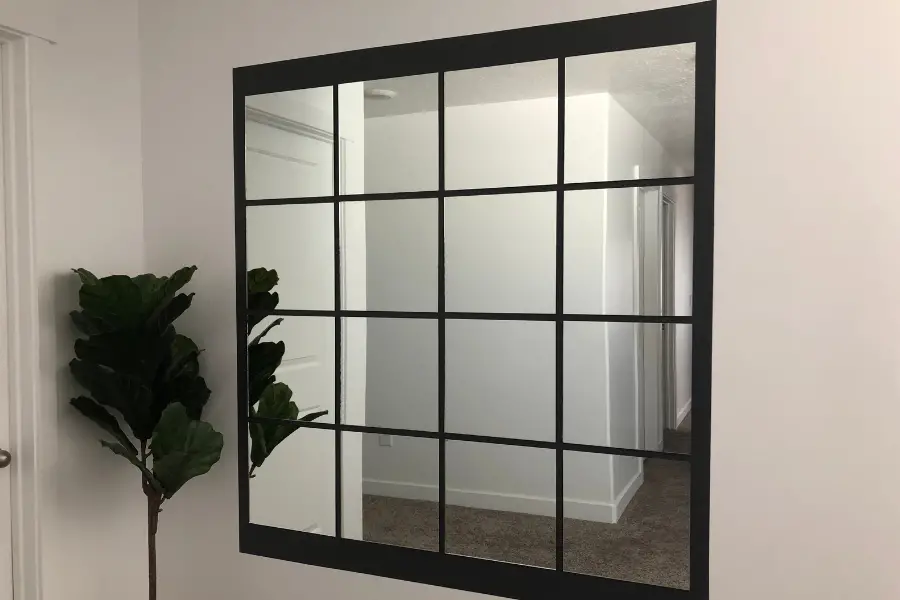
Do you want to create a mirror wall but don’t know where to start? This step-by-step guide will show you how! First, you’ll need to gather the supplies that you’ll need. Then, we’ll walk you through the steps of creating your very own mirror wall. Let’s get started!
Supplies For Mirror Wall
- 12×12 Mirrors
- Liquid Nails
- Double-sided tape
- Paint
- Painter Tape
- Paint Brush/Roll
- Paintable caulk
- Standard Level or Laser Level(Optional)
Steps to creating a Beautiful mirror wall
There are many different ways to build a mirror wall, for this example we are going to be building a frameless mirror wall. Having the mirror frameless allows you to complete this project faster, cheaper, and with fewer tools.
Step 1 – Measure your wall & and pick your pattern
Before we do anything we need to know the size of our wall and how many mirrors we want to use. I went with a simple design that had 4 mirrors horizontally and 4 mirrors vertically.
When you are measuring keep in mind that you will want to have spaces in between mirrors and space for the borders on the outside. I did 1/2 inch space between the mirrors and 1 1/2 inch space for the border on the sides and 3 inches on top. You of course can do whatever type of spacing you would like. You can also do this with large mirrors, or smaller mirrors.
Step 2 – Tape where you want to paint
Now that you know how big your mirror wall is going to be it is time to start taping. It is important to make sure your tape stays level while putting it up. I was lucky enough to have a laser level which helped a ton, but you could do this with a normal level as well, it just may take a little longer.
Step 3- Paint
Once you have your wall all taped up you can now begin painting. For the paint color, you can use whatever you would, for my wall I used one of my favorite paint colors – Shadow Mountain by Behr. One pro tip is before you paint apply paintable caulk on the edge of the tape where it meets your wall. While the paint is still wet remove the tape. This will help keep your lines as clean as possible and prevent paint from bleeding through. Below is a video to show you what I mean.
Step 4 – Install Mirrors
For this step, it is helpful to have a second person helping you out. To being hanging the mirrors first apply the double-sided tape on the back of the four corners, then apply liquid nails everywhere else. The double-sided tape will keep the mirror in place as soon as you place it on the wall and give the liquid nails time to dry so the mirror stays on the wall.
Once you have the adhesive on the mirror place it on the wall assuring it is level. This is where having an extra set of hands is helpful. I would place the mirror on the wall while my wife held the level and the 1/2 inch spacer block to make sure our mirrors were level and spaced correctly.
The last thing to do is keep adding mirrors until you are done. You will also probably need to give the mirrors a good wipe-down because your fingerprints will be all over them.
There you have it! That is how you make a mirror wall. This project is relatively cheap and easy to do, but yields a big impact. Plus, it’s a great way to add some extra light into your home. We hope you enjoyed this step-by-step guide and that your mirror wall turns out beautiful! Let us know.


![DIY Mirror Wall [Easy]](https://i.ytimg.com/vi/YQKSFnAptro/hqdefault.jpg)