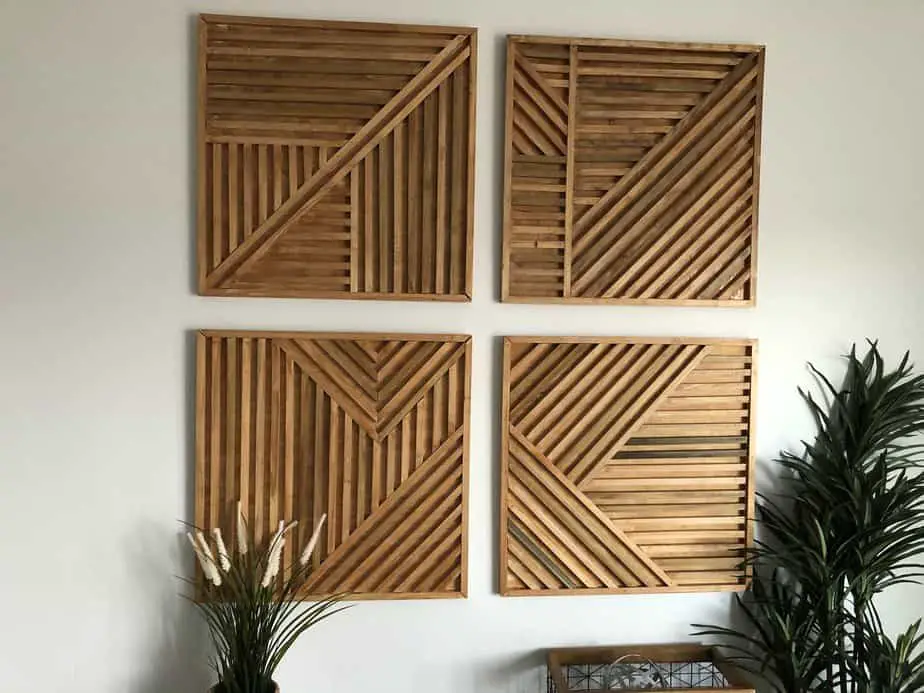
It is always a struggle for me to figure out what I want to hang on my walls. Once I find something I liked and in the size, I like it typically ended being way out of my price range. When I saw this geometric wood wall art I knew I had to have it. However, like most wall art what I wanted would have cost over a thousand dollars to buy. So I decided I would make my own. After searching Pinterest and YouTube I couldn’t find a tutorial on how the style that I wanted. So here I am creating a tutorial for anybody else who wants to build something similar.

Supplies Need For Wood Wall Art
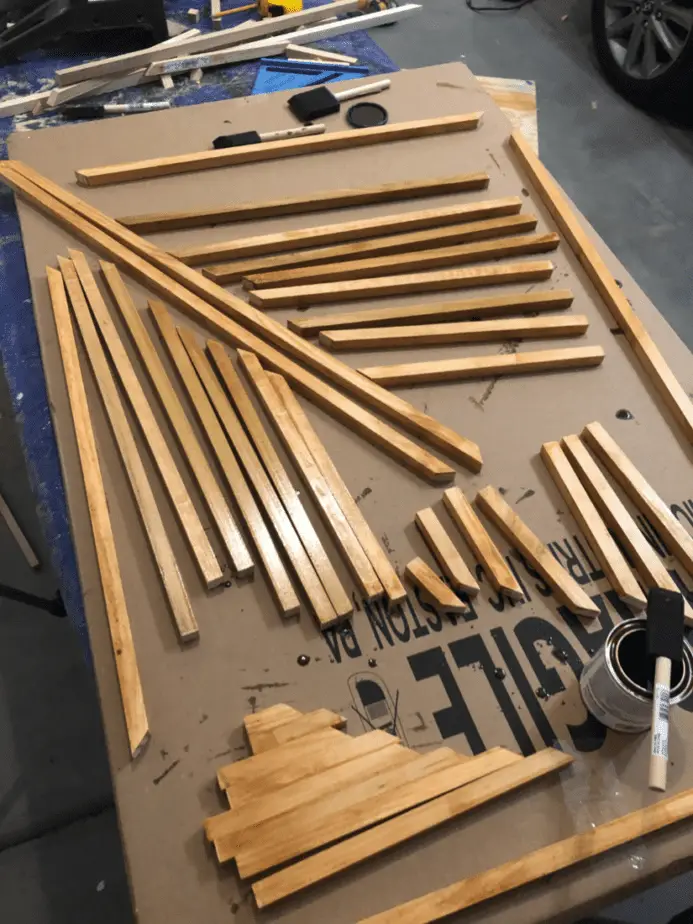
- Square 36-inch dowels.
- 1/4 inch thick 2×2 birch plywood. (You can save money by buying a big piece and cutting it but, I don’t have a table saw, so I just bought the exact size I wanted)
- Wood Filler
- Wood Glue
- Sawtooth Hangers
- Stain. I used golden pecan by Varathane
- Brad Nails 3/4 inch
Tools I Used
So obviously I made 4 different pieces and I wasn’t exactly sure the best way to do everything so I tried 3 different ways. In this blog, I am going to be showing the way that I found to be the easiest and best way. 🙂
Step 1: Sand and stain your 2×2 birch plywood.
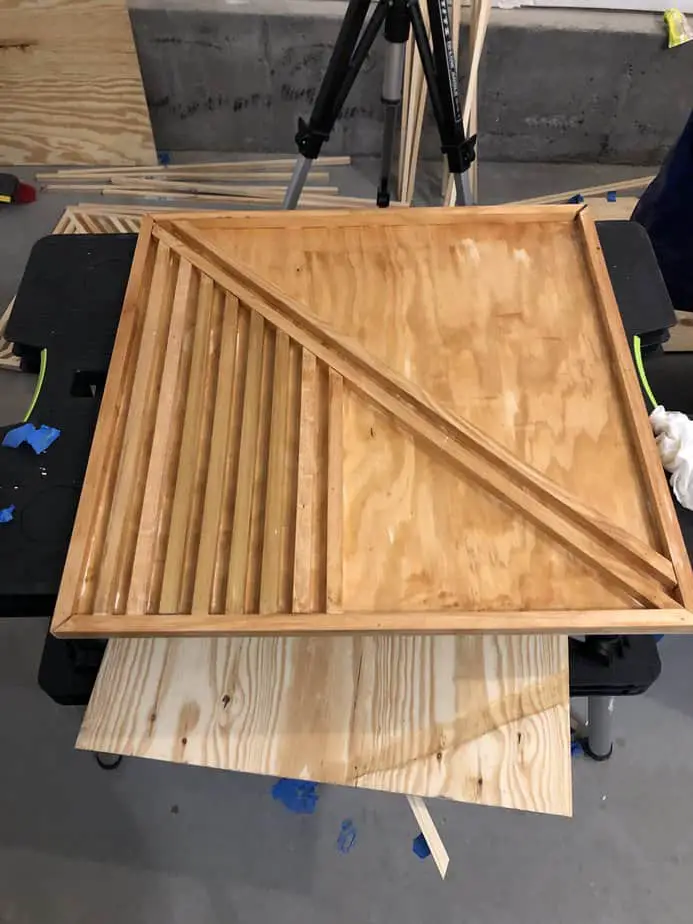
Step 2: Measure and cut your frame pieces. Make sure to cut your frame pieces at a 45-degree angle.

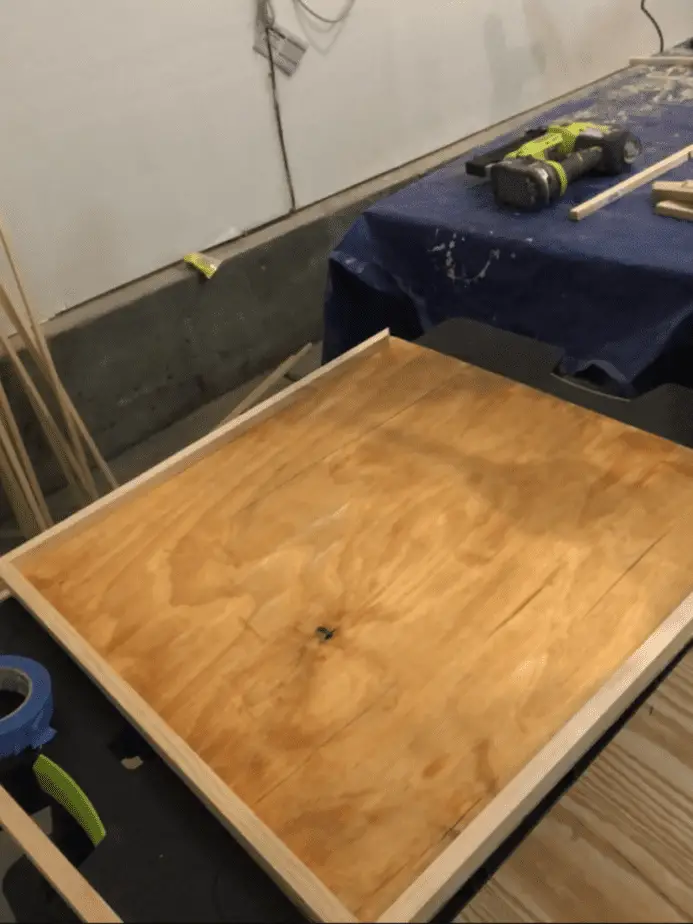
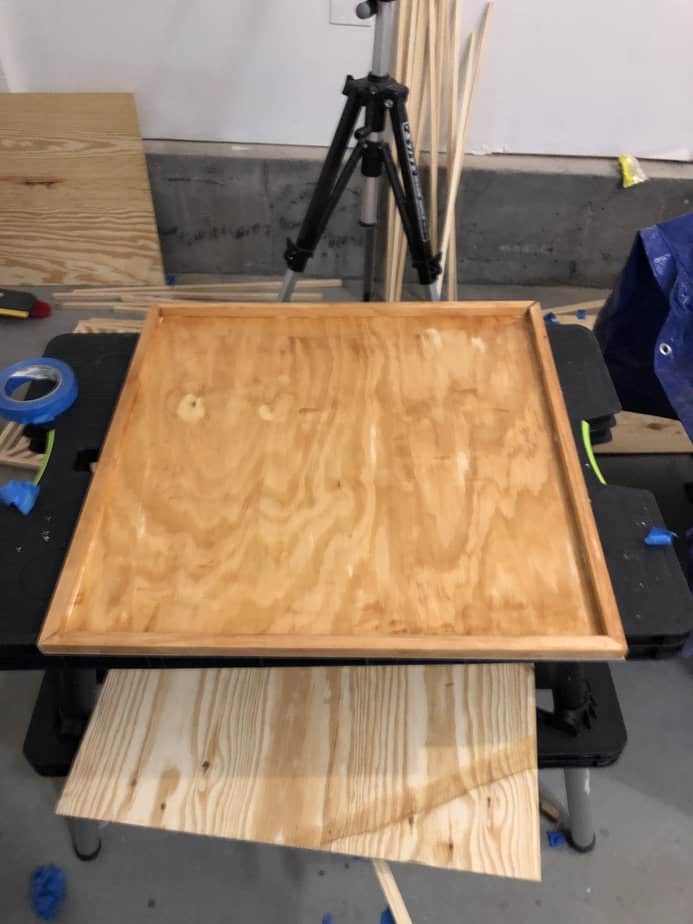
Step 3: Stain your frame. Once it is dry, attach your frame pieces to the plywood. I used a brad nailer with 3/4 inch brad nails and wood glue to attach the frame and all the dowels.

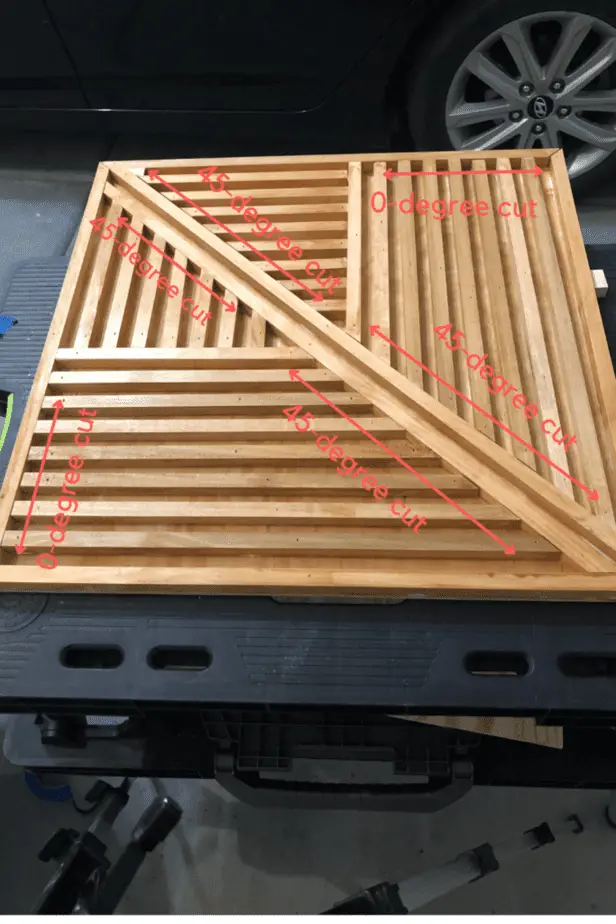
Step 4: Come up with your design. I didn’t really make any sketches for mine. I just dry fit the frame and then started making random angles until I found something I like then built it from there. All the cuts I made for this project were either at a 0 degree or a 45 degree. If you are somewhat a beginner like me I recommend sticking with those two angles. It just makes everything so much easier.

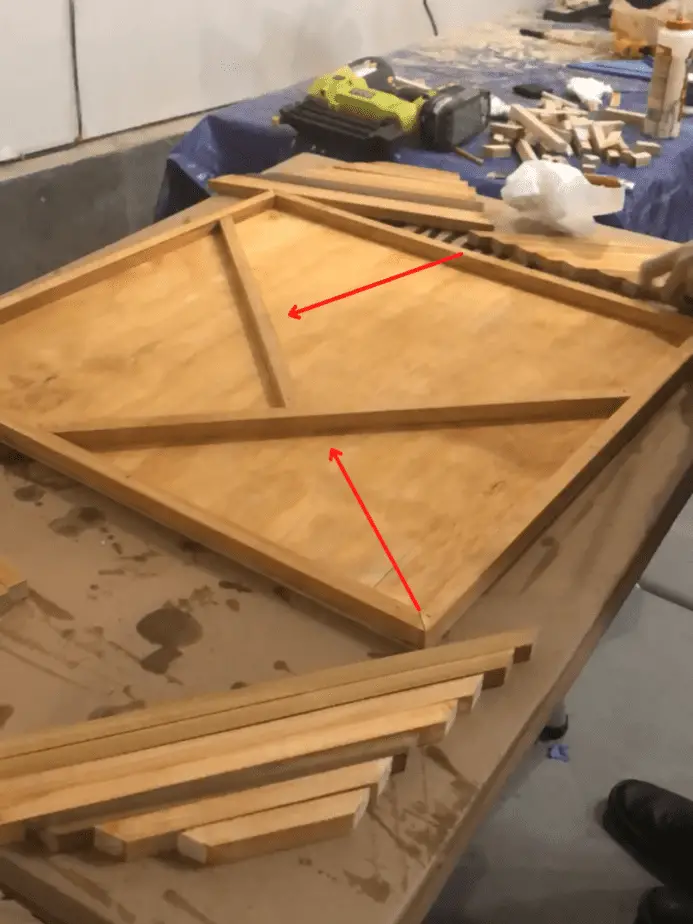
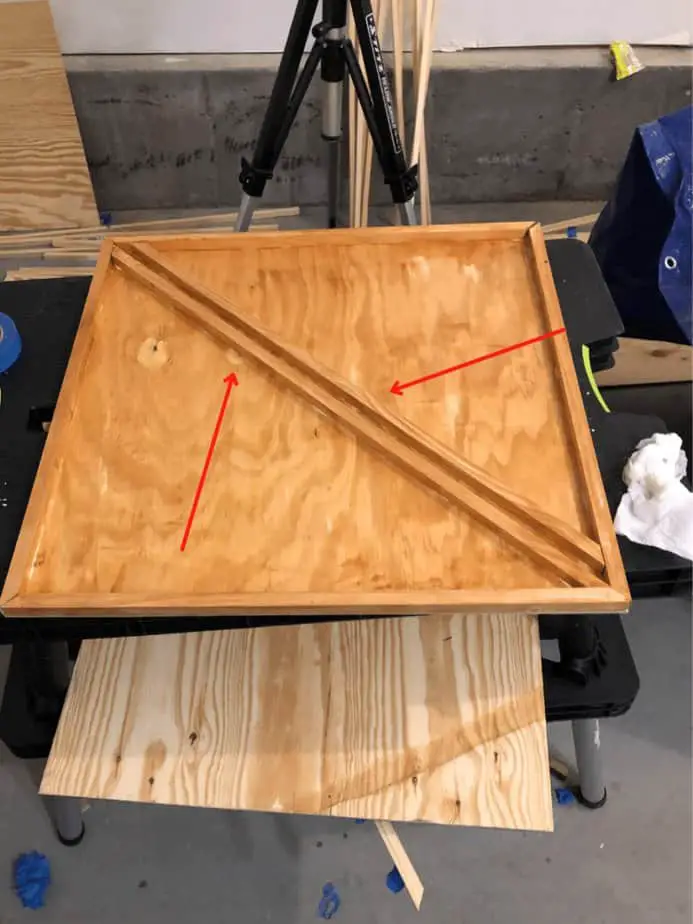
Step 5: It really helped me to cut and stain a few “foundation pieces” and attach it to the plywood. Here are a few examples of my foundation pieces.
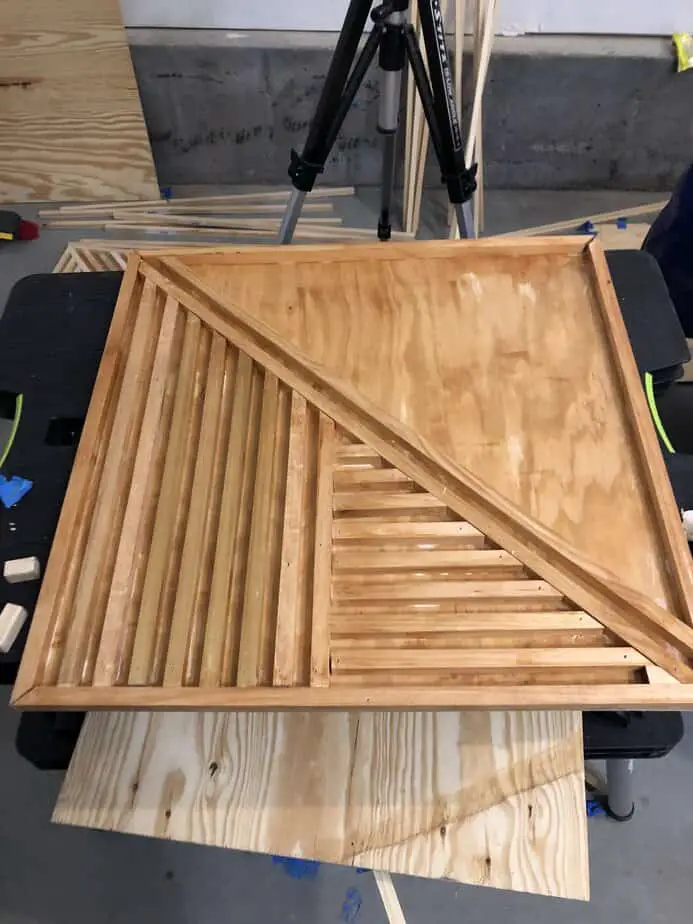
Step 6: Now that you have the foundation. Measure and make all the cuts for the rest of your piece.
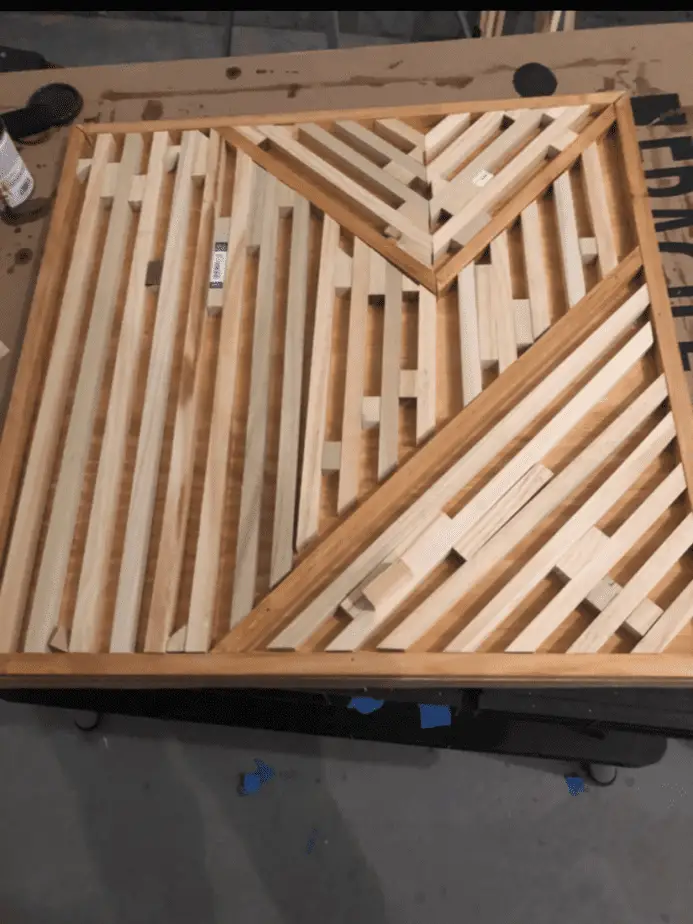
Step 7: Sand and stain the rest of the pieces. The reason you want to stain everything before you attach it the plywood is because it is almost impossible to get in all the cracks afterward. Trust me.. I learned this lesson the hard way.
Step 8: Once your pieces are dry attach them to the plywood. I used a scrap piece of wood to keep the spacing even. Also, make sure you get the right-sized brad nails so you don’t have nails poke through on the back.
Step 9: The next step is to now fill in all the nail holes. I used dap wood filler. Once all the holes are filled give it time to dry before moving onto the next step.
Step 10: Give the holes that you filled a lite sand. After you sand you could also add another coat of stain.
Step 11: Finish your masterpiece off with a coat or two of polyurethane.
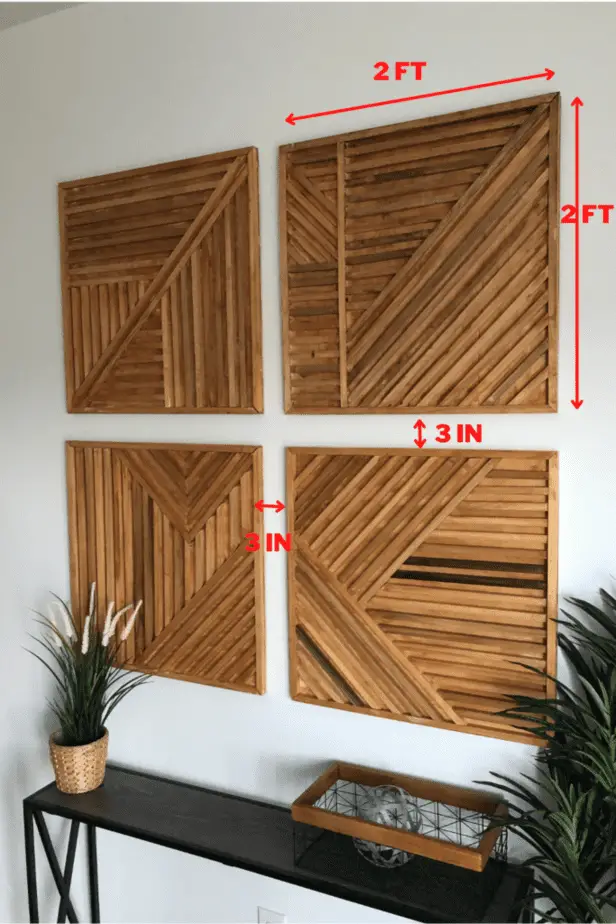
Step 12: I attached a couple of sawtooth hangers to the back of my pieces to hang them on the wall. There are lots of different things you could use to hang them on the wall, but the sawtooth hangers made it really easy for me. And here is the spacing I used to hang them up on my wall.