
An electric fireplace is an easy way to upgrade any room. After my sister in law saw the electric fireplace wall we did at our house she wanted to do the same thing but on a bit of a smaller scale. She also wanted to add a hearth to her fireplace. So here I am writing another post about electric fireplaces because this fireplace has a lot of different features that might fit your style more.

Supplies & Tools For Electric Fireplace with Hearth
Supplies
- (14) 2″x4”x8′ any type of 2×4 will work, I just got the cheapest I could find at my local hardwood store
- (4) 1″x6″x6′ common board
- (2) 1″X10″X6′ common board
- (14) .375’x6’x8″ shiplap
- (2) 1-1/8 in. x 1-1/8 in. x 8 ft. White Outside Corner Molding
- Wood Screws. I got 2 boxes of 3 1/2 inch screws
- Paintable Caulk.
- Spackle.
- 2-inch brad nails
- Electric Fireplace. Here is a link to the one I got off Amazon. I did a full review of this fireplace on YouTube if you want to learn more about the fireplace features you can check out the video here.
- *Optional (2) 1.5″x.75″ MDF board. This is used if you want to add baseboard molding to the bottom of the fireplace.
- Paint
Tools That I Used
Step To Build Electric Fireplace With Hearth
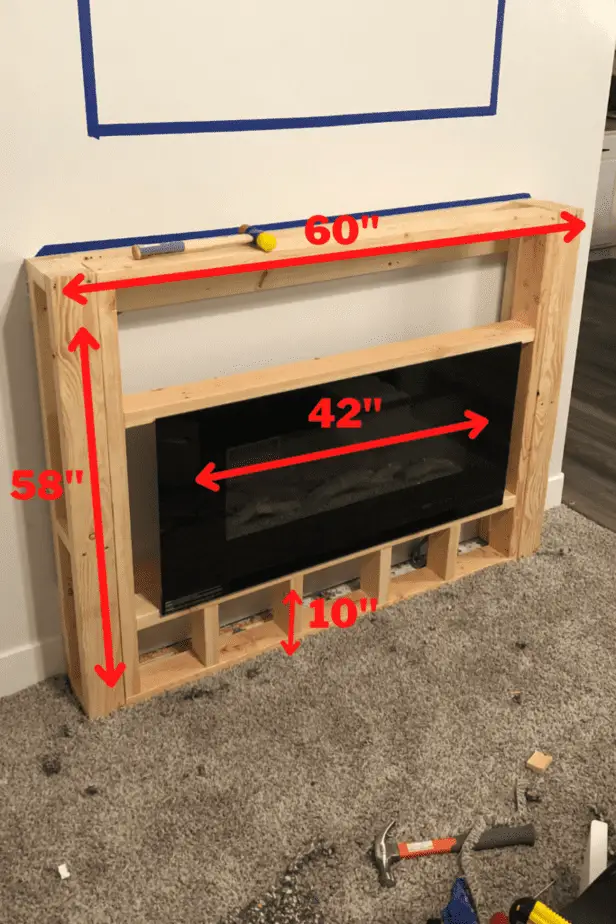
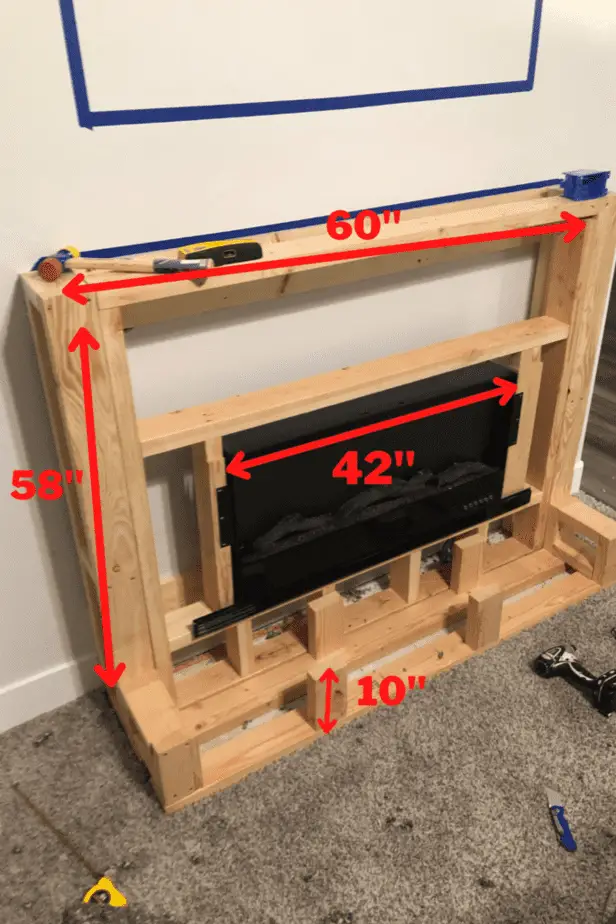
Step 1: Decide how tall and wide you want your fireplace to be. The diagram below shows the height and width that we went with. The full width of this wall was pretty small so we just cut the width in thirds and that is how we decided the size.

Step 2: Locate the studs on your wall and attach your common boards to the studs using wood screws.
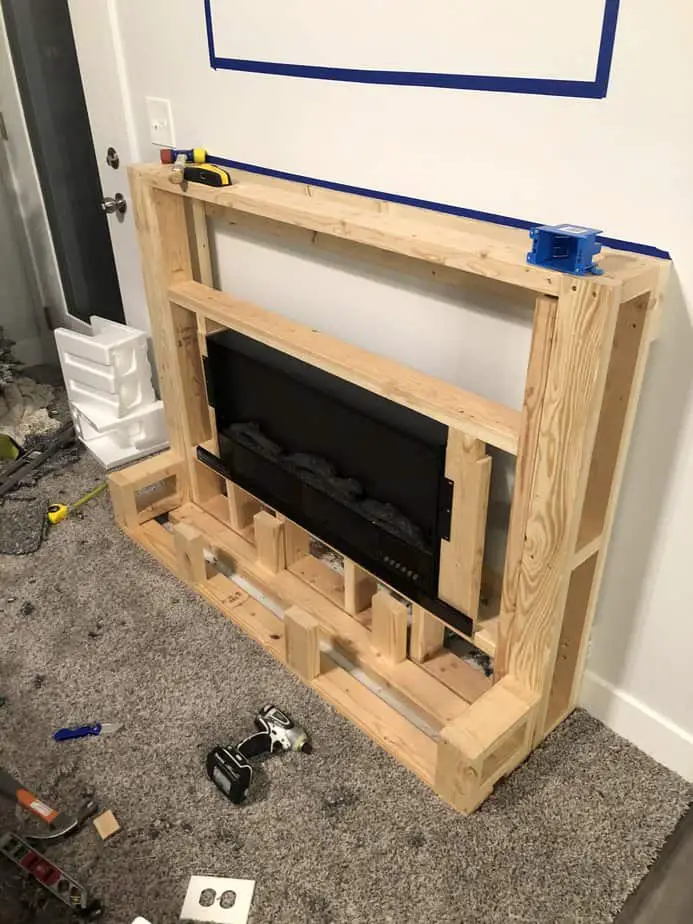
Step 3: Now it is time to start building the side frames. Take your 2x4s and cut them to the desired height of your fireplace. Now cut 6 pieces to the desired length of your fireplace (not including the hearth). For us we want the length to be 9 inches so I cut the 2×4 at 6 inches because you will be attaching it to 2 2x4s and they are 1.5 inches thick so 7+1.5+1.5 gives me 9 total inches. Hopefully, I didn’t lose you there on the math. 😉
Step4: Attach the side frames to the common board on the wall. I used 3 1/4 wood screws to make sure it was secure. I also recommend removing the carpet where the fireplace will go before you begin. I recommend having a good utility knife to cut the carpet out.

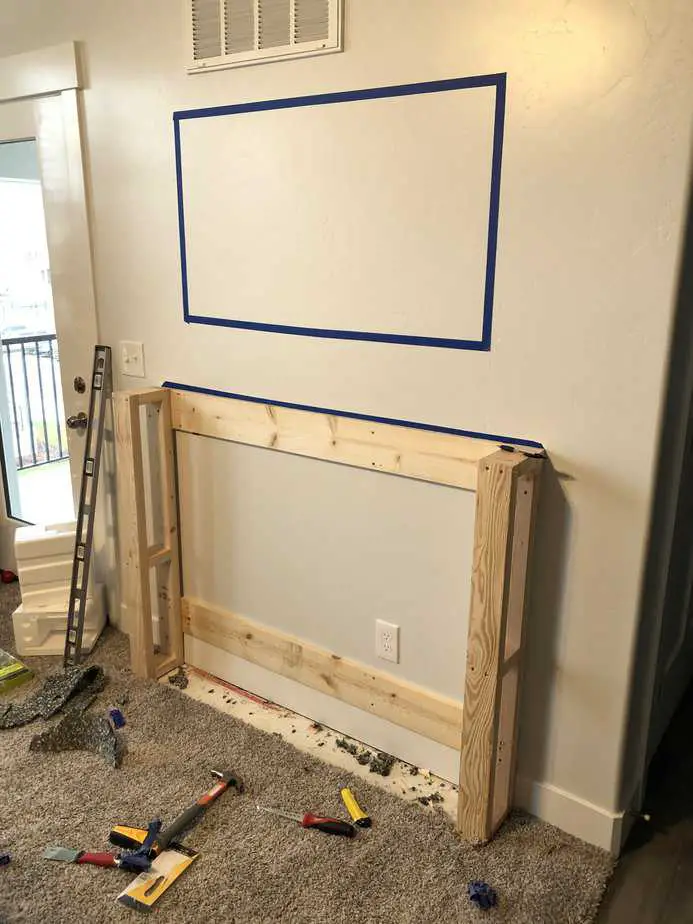
Step 5: Measure the length between your two side frames and start building your front frame. Before you get too far make sure to double-check that the front will fit snugly on the sides.
Step 6: I recommend having your electric fireplace before you build your front frame to assure you have the correct measurements. For this project, we use this 42-inch fireplace that we got off of Amazon.
Step 6: Once the front frame is built attach it to the side frames using wood screws.
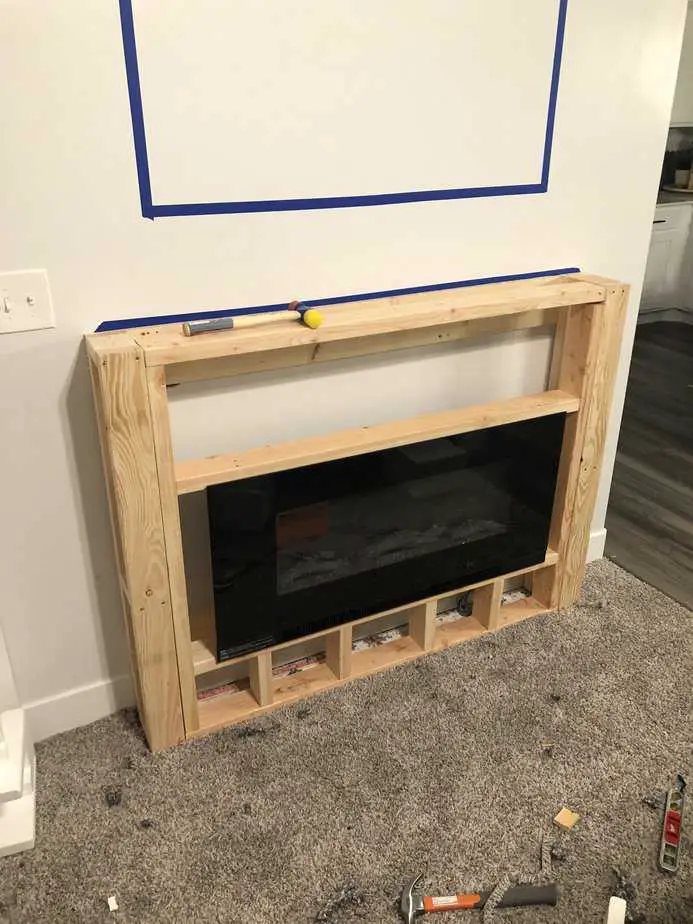
Step 7: (Optional) If you want to build a hearth follow these steps. If you don’t want the hearth then you can skip to step 8. When trying to build the hearth I honestly had no idea where to start and I couldn’t really find any resources on how to build it. So hopefully this is helpful for other people out there looking to build a hearth. Disclaimer I am in no way a professional, this is just how I built mine and it works and is super steady. 🙂
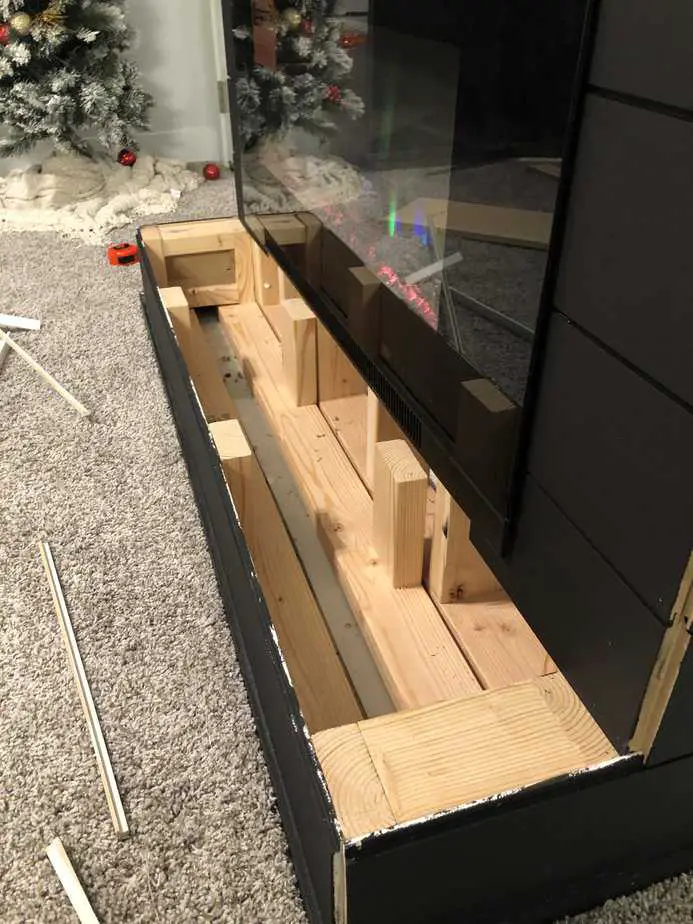
- 7A: Cut (2) 2x4s to the desired length of your hearth. For me, I just cut it the same length as the fireplace, but I know some people like to have bigger hearths so you can make it even longer if you would like.
- 7B: I wanted the hearth to be 10 inches high and 9 inches wide. So I cut (8) 2x4s to 7.5 inches once again accounting for the 1.5 inches thick 2×4 they would be attached to. Then I cut (4) 2x4s into 7-inch pieces. I forgot to take more pictures during this process so helpfully this picture helps you visualize what you need to do.
Step 8: Paint the edges of the shiplap. If you are doing white you don’t have to worry about this, but if you are doing any other color you will want to paint the edge of the shiplap before you attach it. Trust me, you will thank me later, painting between those cracks after the shiplap is hung is a slow and difficult process.
Step 9: Once the paint has dried it is now time to hang that shiplap. I used 2-inch brand nails and a brad nailer to hang the shiplap. I would not recommend doing it any other way. The brad nails make it quick and leaves very small holes. Try your best to nail in the groove so you have fewer holes to fill later on.
Step 10: Use spackle to fill in any visible holes. I like to use this spackle because it dries super fast and is easy to sand. After that dries give it a lite sand
Step 11: Paint the rest of the shiplap. We used a common paint roller and brush to finish the job.

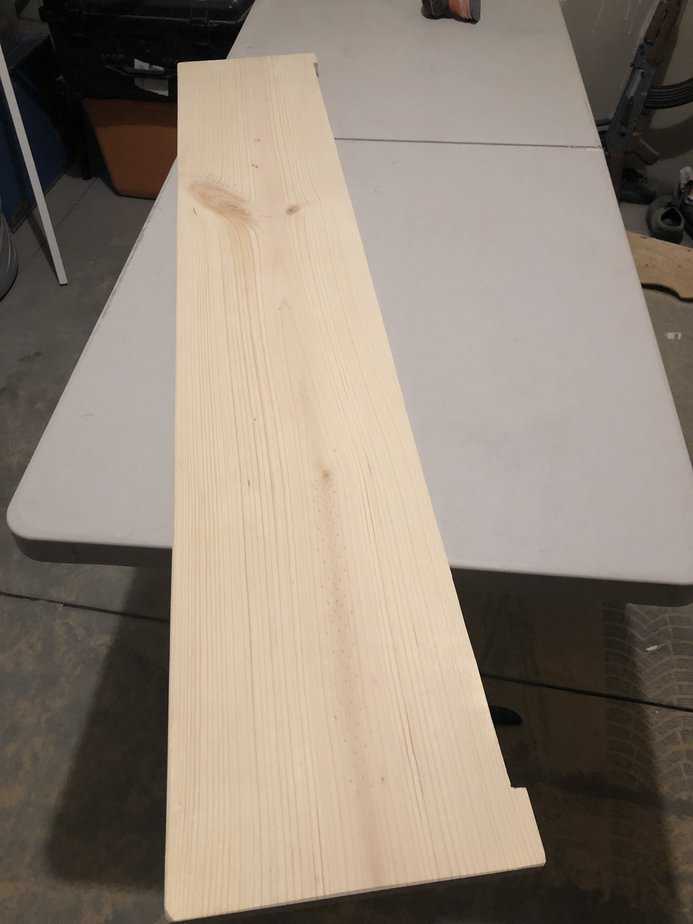
Step 12: For the mantel, we used 1″x10″x6′ common board. Originally I planned to build a whole mantel that was going to be 6 inches tall, but we placed the 1″ common board on the top while we were measuring and actually loved how it looked. It made it clean and simple, so we just stuck with that. I cut it to length and sanded down the corners then attached it with some brad nails.
Step 13: For the top of the hearth we ended up using the same 1″x10″x6′ common board. This is for sure a cheap option to go, but it looks amazing. I cut a small groove out using a jigsaw so it could sit on top nice and snug with the fireplace. I then sanded down the corners and gave it a natural stain.

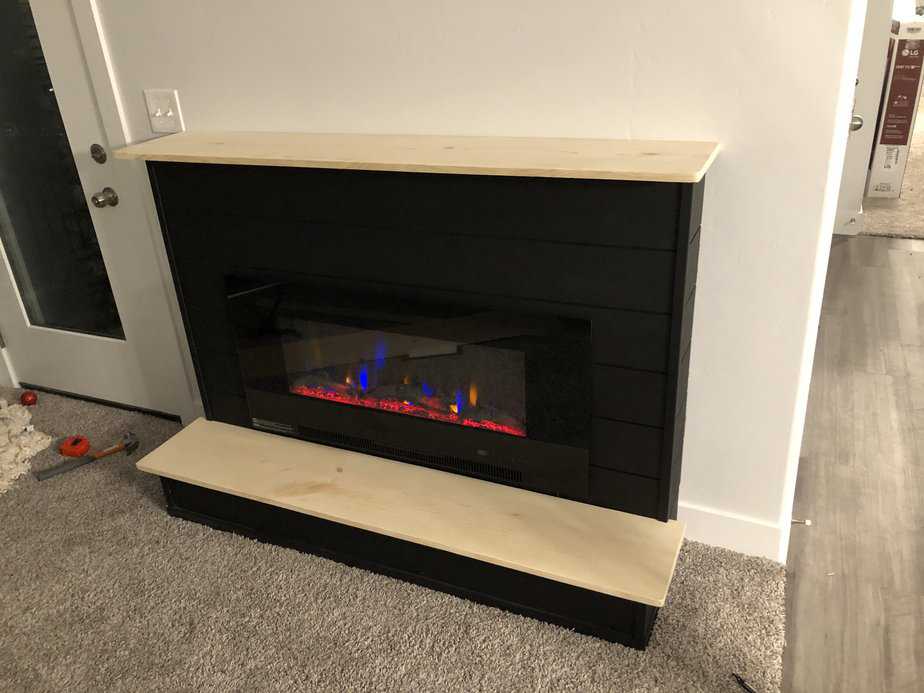
Step 14: The last step is to add your corner molding to clean up those sides.
If you are interested in doing something like this and want to explore other styles you can check out this post on how to build a full wall fireplace.
