If you are looking for an easy project that can be done on a Saturday afternoon this a great way to go. At our house, we have this really long entryway. It was awkward and didn’t really have much of a purpose. As I cruised around Pinterest I found this idea for an entryway board and batten wall with hooks. It seemed like it would be perfect for our long entryway.
Before You Begin
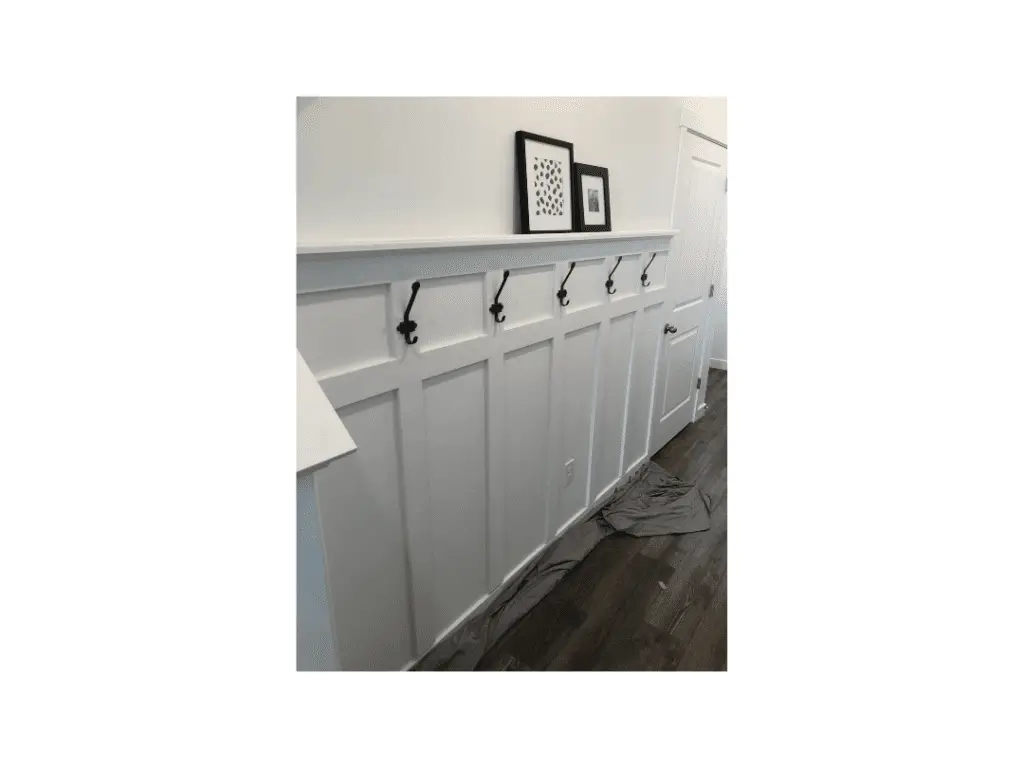
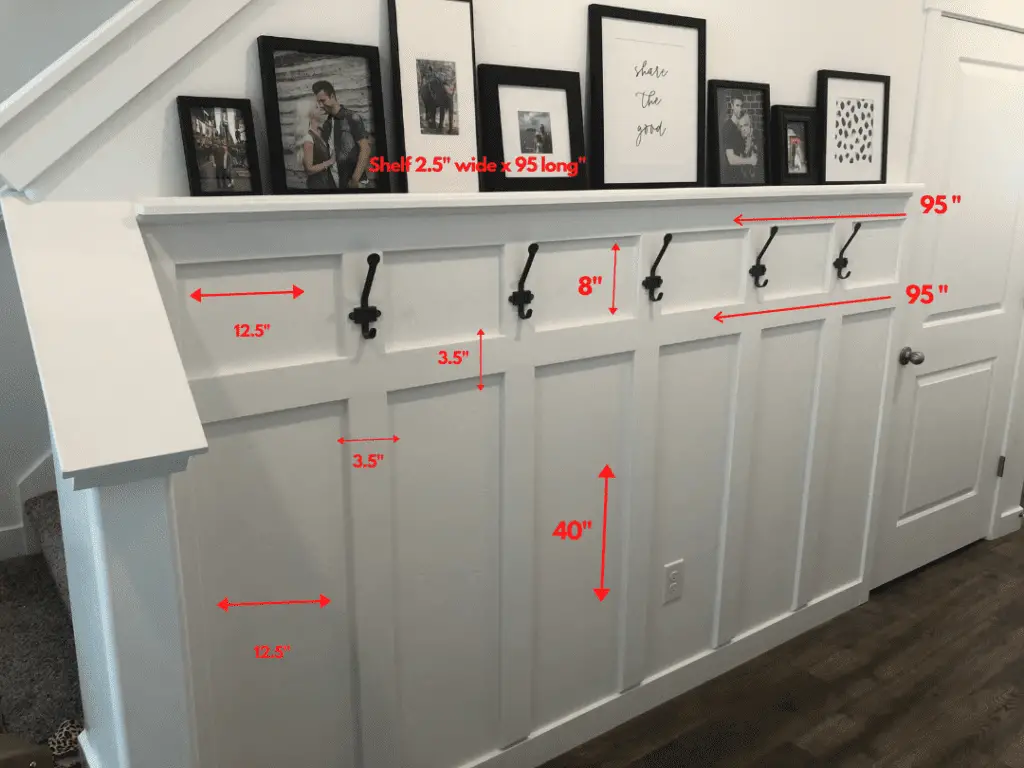
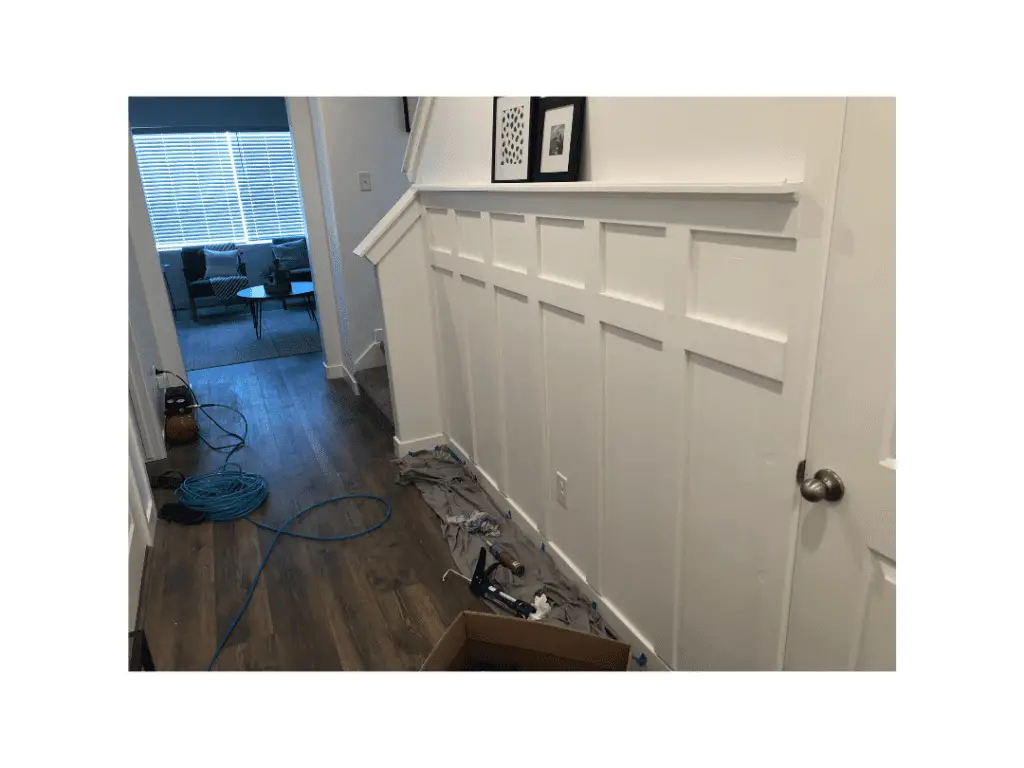
Before you begin decide what style and spacing you are going for. Our wall is 95 inches long and I knew I wanted at least 5 hooks so we decide to space each board 12.5 inches apart and use 3.5inch wide boards. After we had a general idea of the spacing we had to then figure out how high we wanted the board and batten wall to go. To get a little of a visual we used tape to get an idea of how different heights would be.
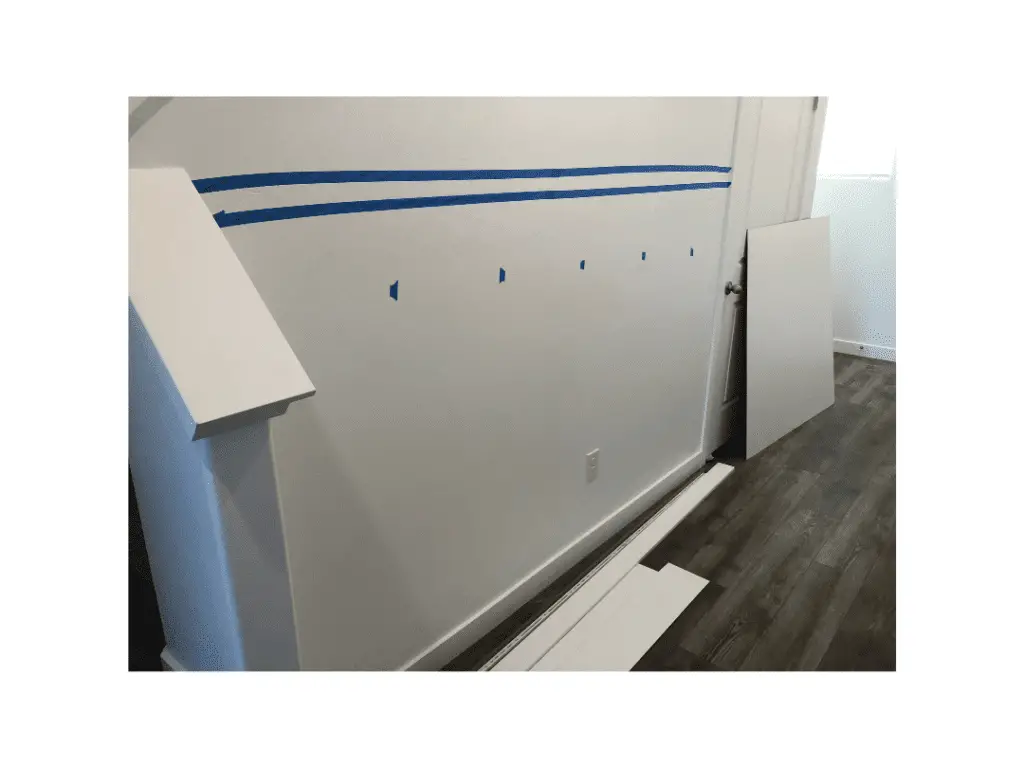
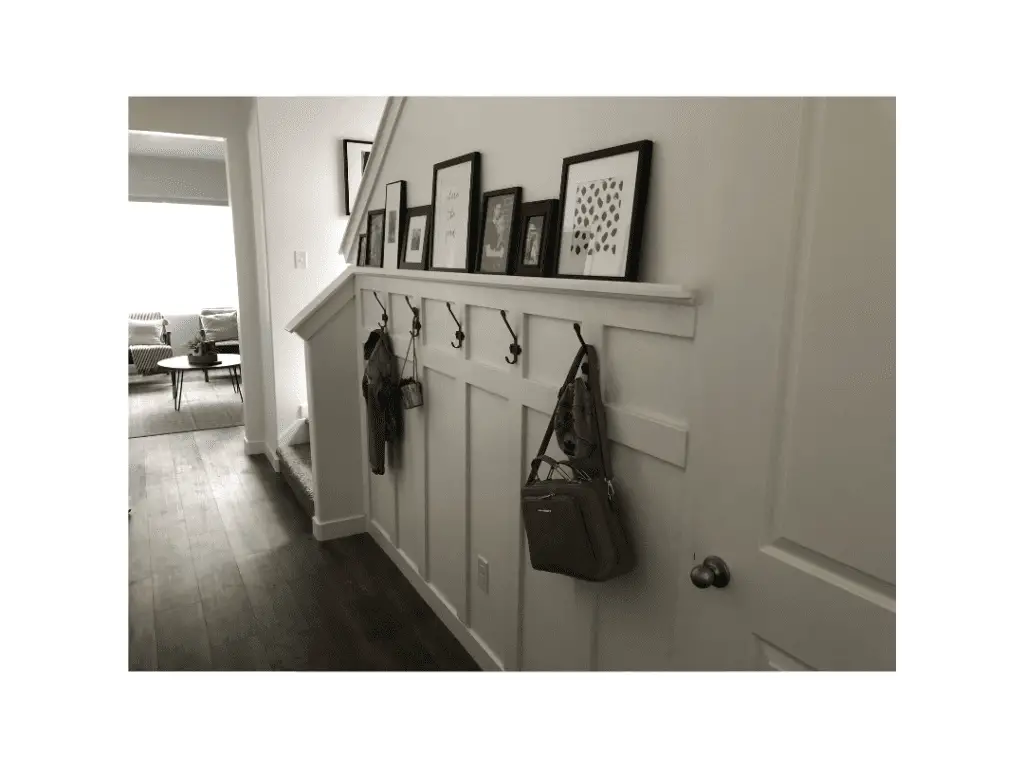
We decided to go up 4 feet plus a few inches for the shelf. It is completely up to you on what height and spacing you want we just felt this would look good in our space. We also wanted to line the boards up with the little wall that leads up to the stairs.
Supplies and Tools Needed
Supplies
- 11/16 in. x 3-1/2 in. x 96 in. Primed MDF Casing Moulding (For boards)
- 11/16 in. x 2-1/2 in. x 96 in. Primed MDF Casing Moulding (For shelf)
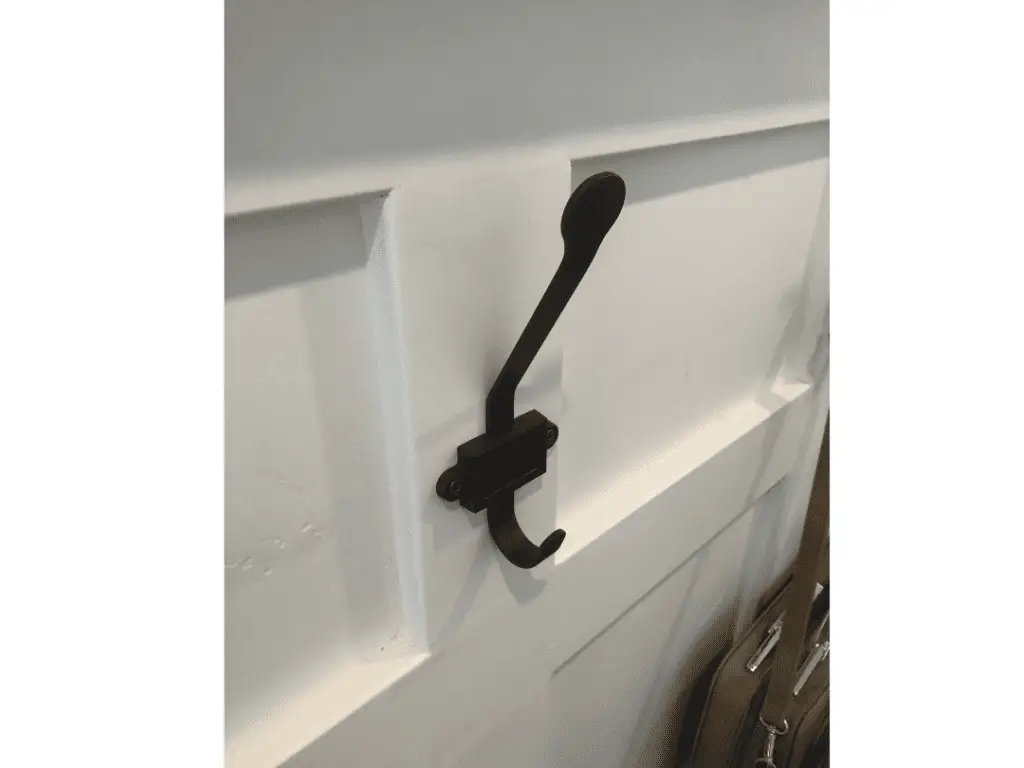
- Hooks – I got mine from IKEA, but you can use whatever looks best for you. I bought this set and just used the hooks and scraped the piece of wood it came with.
- Liquid nails
- Wood filler or spackle
- Paintable Caulk
Tools
- Brad Nailer
- 2 inch brad nails
- Circular Saw or Miter Saw
- Level
- Caulk gun
- Nail set (I had to use them because I sucked at using the nail gun and had to push a few nails into the wood a little deeper)
- 220 Grit Sandblock or Orbital Sander
- Tape measurer
Lets Start Building
Now that all the planning is done and the supplies are bought, it is time for the fun part. I will go through step by step how I built this and some of the mistakes I made that you can learn from. 🙂
Step to Building Entryway Board and Batten Wall
Step 1
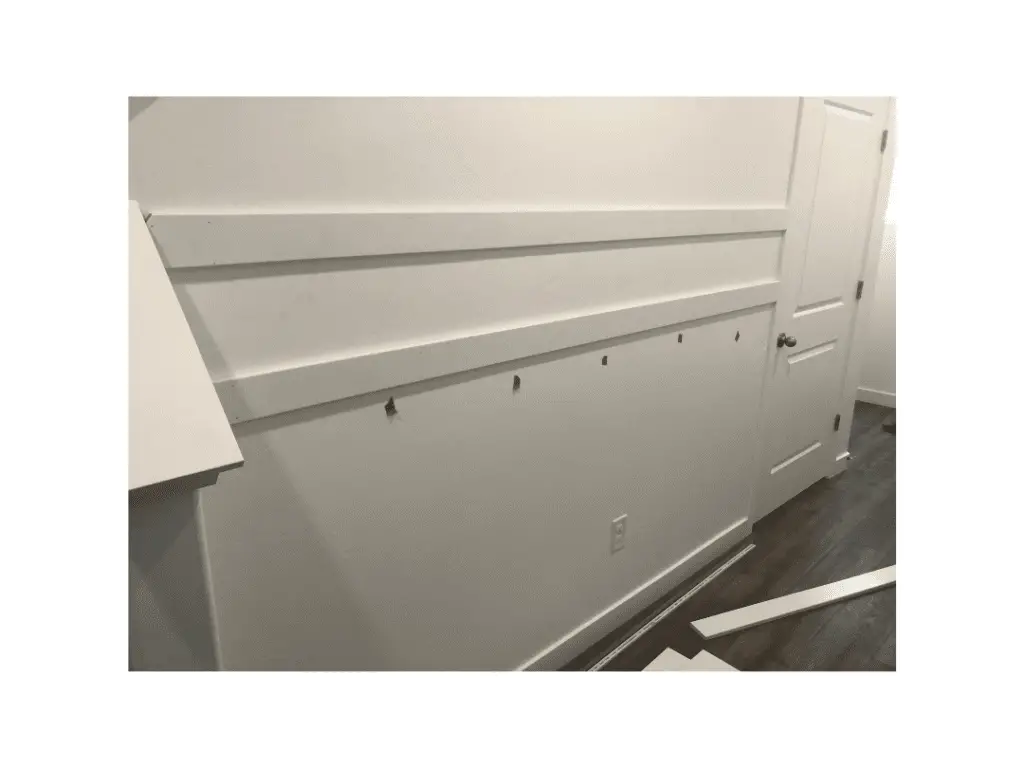
Start with the very top horizontal boards this will act as your guide as you cut all the vertical ones. Make sure to have a level handy and someone to maybe help hold the board while you attach it to the wall. With all the boards you will want to apply liquid nails on the back then when you have the board in the right place attach with brad nails. Be sure to note where studs are located, because stuff will hang on these boards they need to be attached to something sturdy.
Step 2
Measure the length from the board to the middle board and start cutting. In my case, I cut the bottom of the vertical board at a 45-degree angle to prevent them from hanging over the baseboard. This is an easy way to prevent the boards from hanging over the baseboard. You will also want to use a level take to make sure you are putting each board on straight.

Step 3
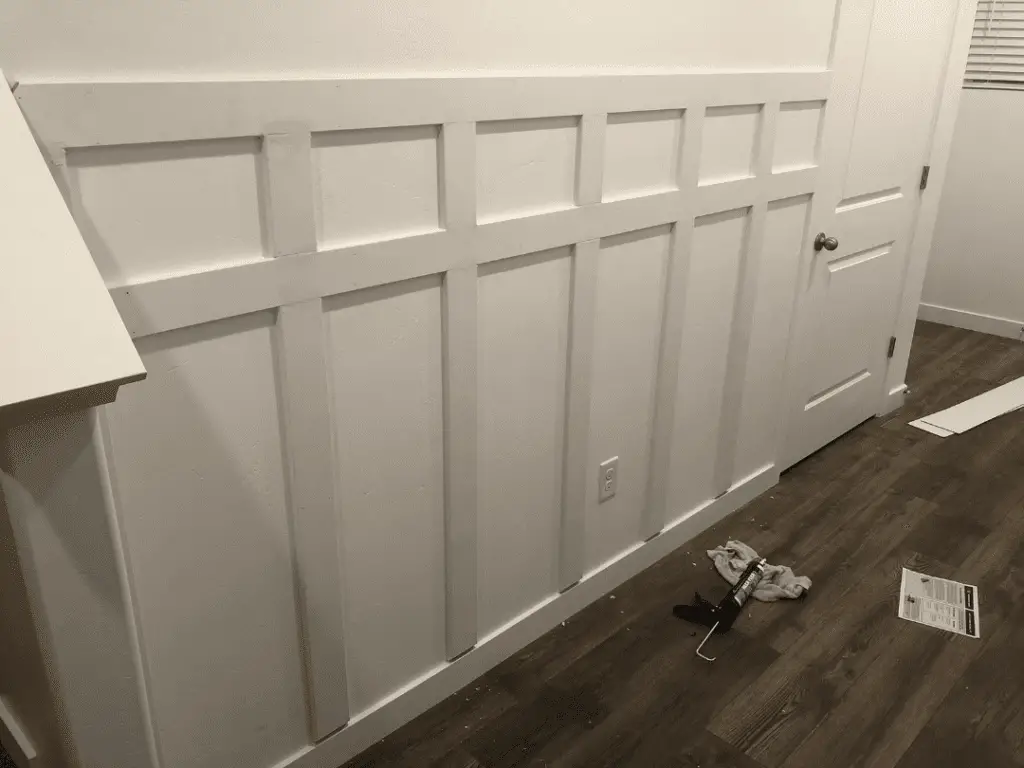
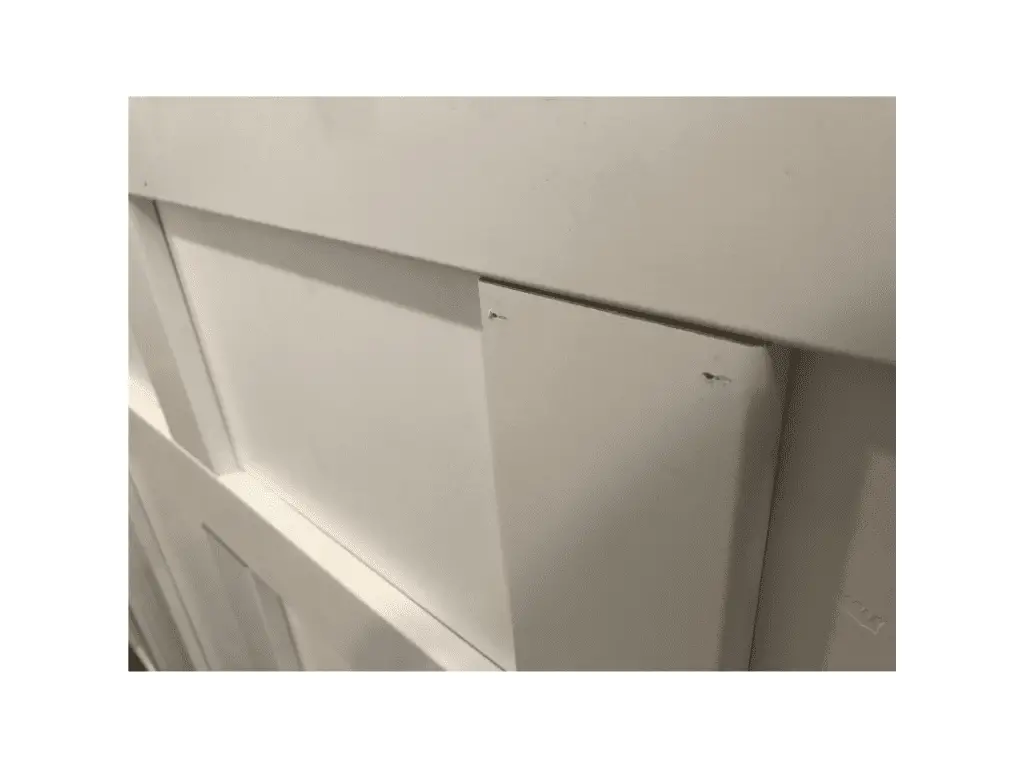
After you have all the boards on the wall you will need to fill in all the nail holes with wood filler. You will also want to spread either wood filler or some sort of spackling to get rid of the gap between where the boards meet.

Step 4
I know after you put the wood filler and spackle on it can look pretty ugly, but trust me you won’t be able to see all that after you sand. Sanding sucks, I am not going to lie, but it is super important. For this project, I ended up adding more spackling, sanding and then spackling and sanding again. Don’t be afraid to continue this process as much as you need to make sure it looks just how you want it to, you won’t regret it.
Step 5 (Optional)
If you are looking to put some decor pictures on top of your wall then keep reading, if not skip this step. 🙂 As I looked around the internet I would see all of these cool shelves on top of board and batten walls, but nobody went into detail about how to do it. So I hope this post will help someone who is having the same problem. Note: There could be a better way to do this, but this is the way I figured out so I thought I would share. If you find a better way, let me know in the comments.
How to build shelf for entryway board and batten wall
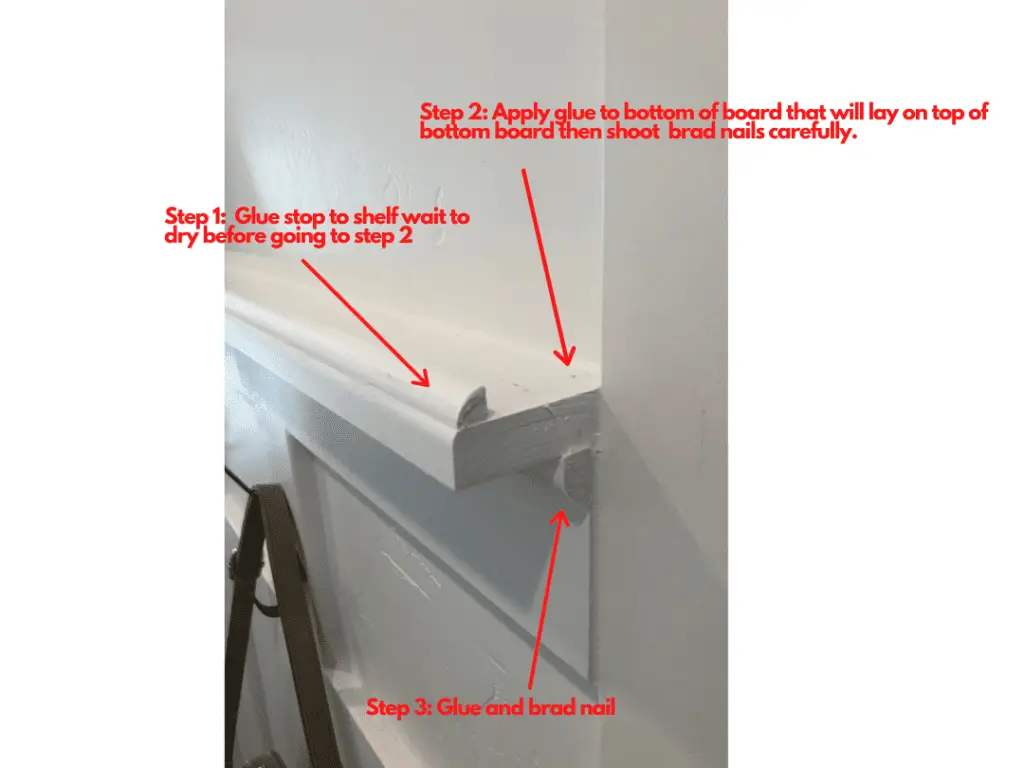
Start by creating some sort of rail or stop so your pictures don’t just fall off when you lean them against the wall. I found this trim piece at Home Depot and it did the trick perfectly. You should be able to find a similar piece at your local hardware store in the trim and molding aisle. I attached this to my 2 1/2 inch wide MDF using liquid nails. I didn’t use nails because I was afraid it would split the wood and the nails I had would have also been too long and poked through the bottom.
Then I let that glue dry overnight just to make sure it was going to be strong enough for what I needed. After letting that dry I took my 2 1/2 wide mdf and applied liquid nails on the bottom only on the area that would rest on top of the bottom board. Once it was in place and level, very carefully shot brad nails right on the edge as close to the wall as possible assure not to shoot a nail through the board.
I wanted to add a final trim piece below the shelf to give it a little more style. This isn’t necessary, but I thought it would look good and I am glad I did it.
Step 6
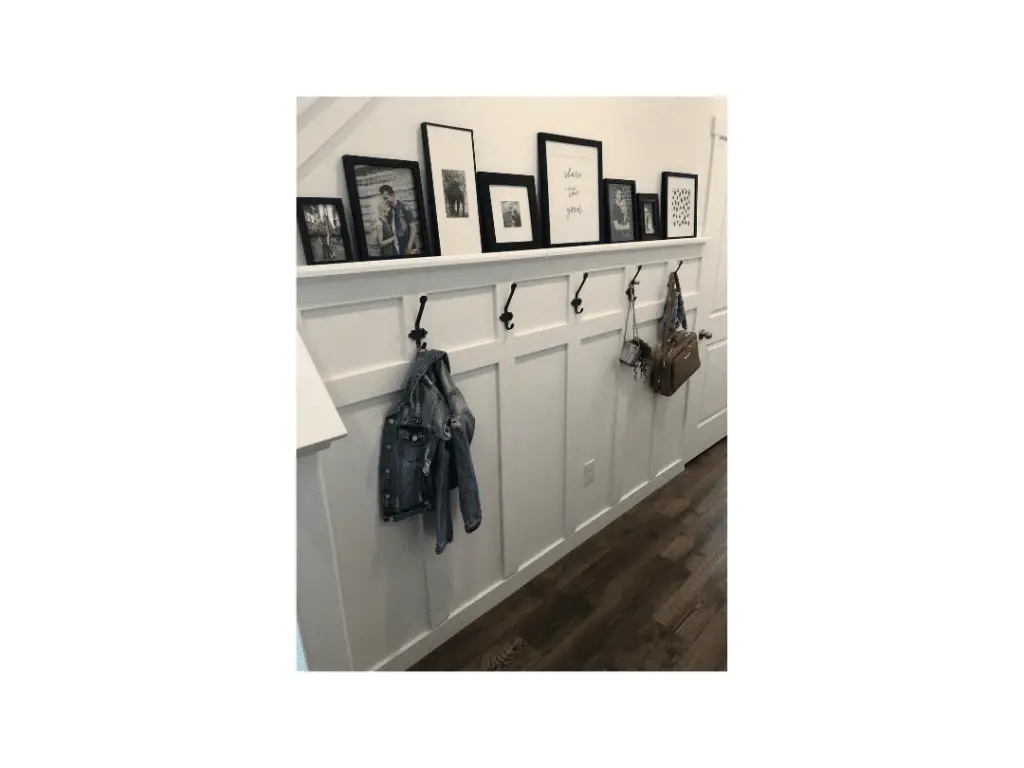
The final step is to add the hooks. You can get whatever type of hooks match your style. When hanging your hooks just make sure that they are level with each other. Now that you have the hooks on the wall you can start decorating and hanging stuff up on your entryway board and batten wall. If you are looking for more ideas for board and batten wall you can check out this blog post.