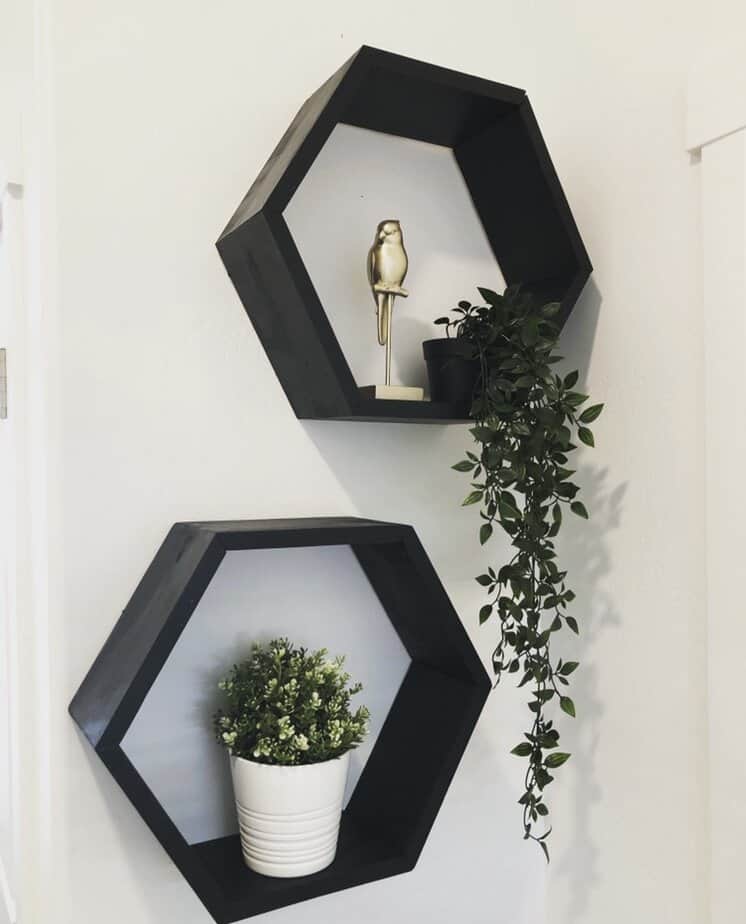
We have a lot of empty walls at our house and sometime figuring out what to put on those walls can be a bit of a challenge. I came across these hexagon shelves when searching for ideas and I know immediately it was something I wanted to try. These hexagon shelves are beginner friendly and very affordable. They took be about 3 hours to make if you don’t count the time I had to wait for stain to dry.
@housetohomediy Hexagon shelves for under $25. #diy #shelves #interiordesign #homeprojects #diyprojects #diyshelves #woodworking
♬ Holy – Justin Bieber
Tools and Supplies Needed For Hexagon Shelves
Tools
- Brad Nailer
- Miter Saw or Circular saw
- Speed square if using the circular saw
- Level
- Sander
- Sawtooth hangers
- Tape Measurer
Supplies
- Wood glue
- Wood filler
- 1 x 6 x 8foot common board
- Stain
- Polyurethane
Steps to build hexagon shelves
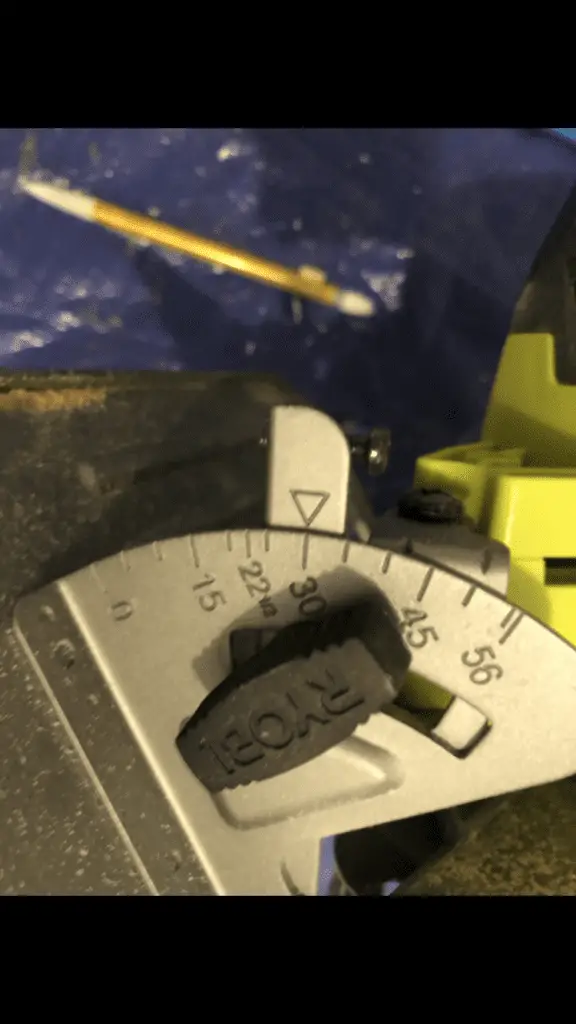
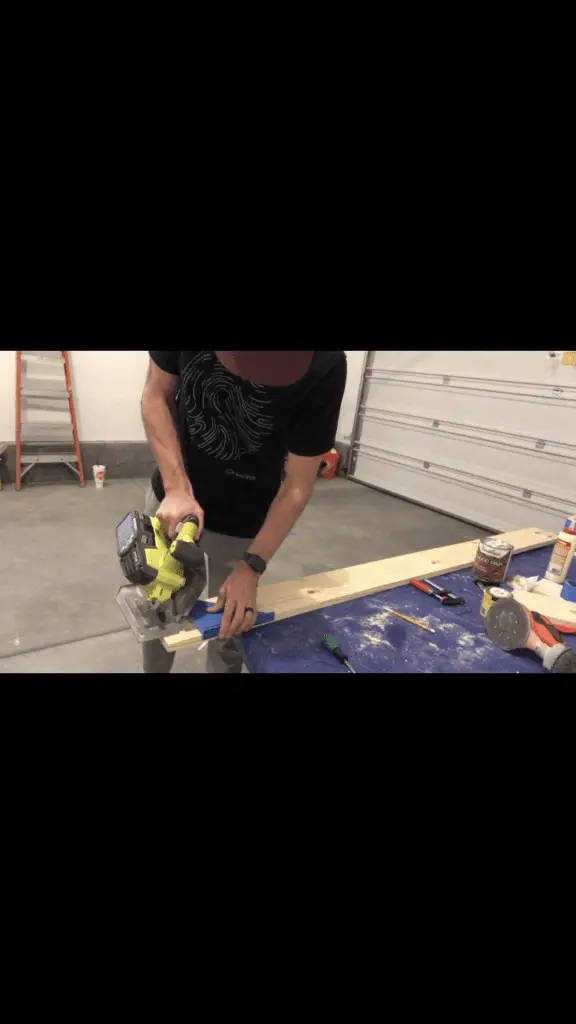
Step 1. Cut wood at a 30-degree angle on each side. From the long end to long end I choose to go 9 inches. You can go longer or shorter if you would like. Whatever length you choose you will need 6 pieces for each hexagon shelf. For the cuts, I used a circular saw with a speed square. I made sure the bevel was at a 30-degree angle on my circular saw then I would flip the board after every cut. If you do have a miter saw that can make 30 degrees angle and 6 inches cuts I would recommend using that.
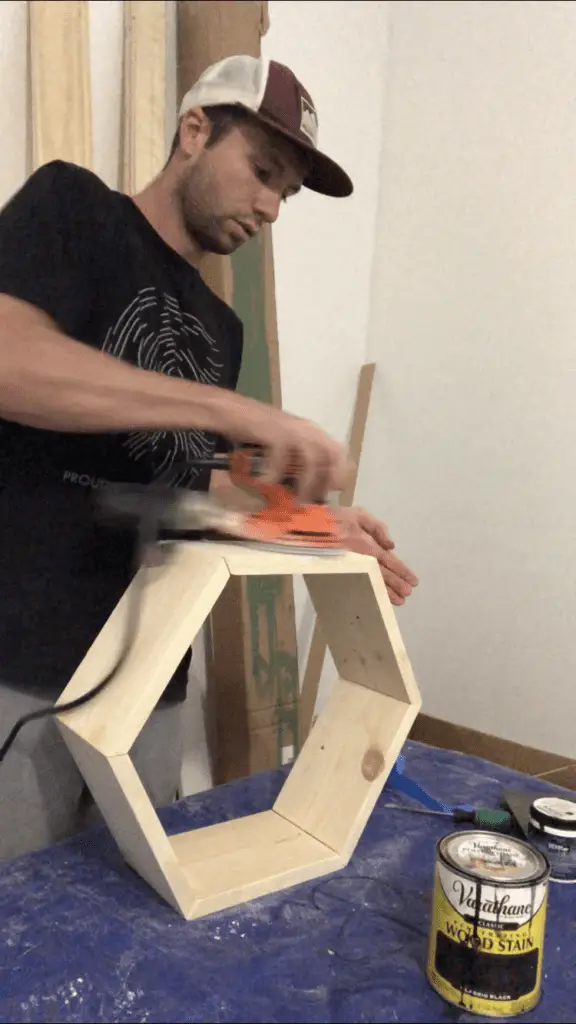
Step 2. Sand all the wood so you have smooth edges. I used an orbital sander to make the job go by faster.
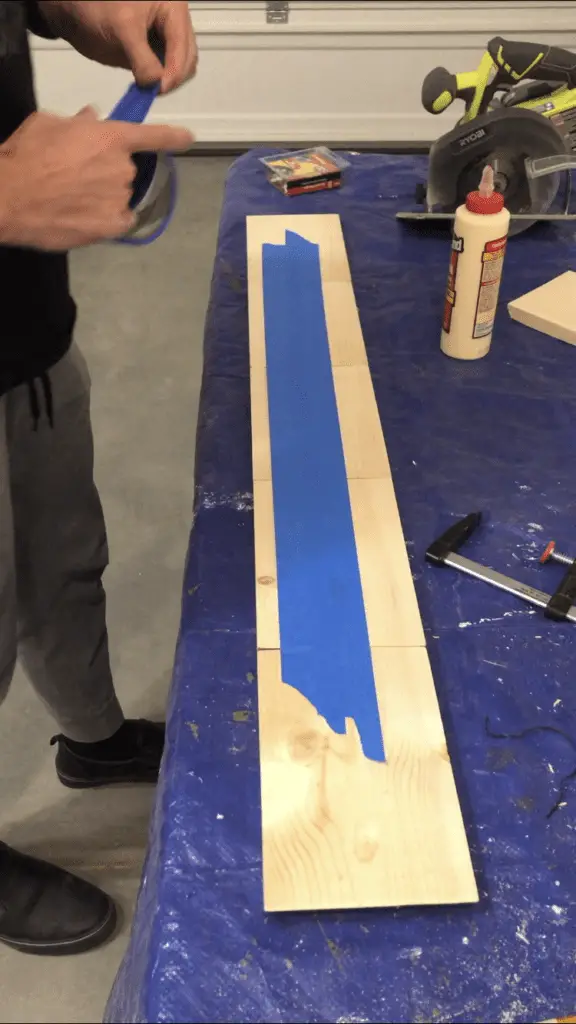
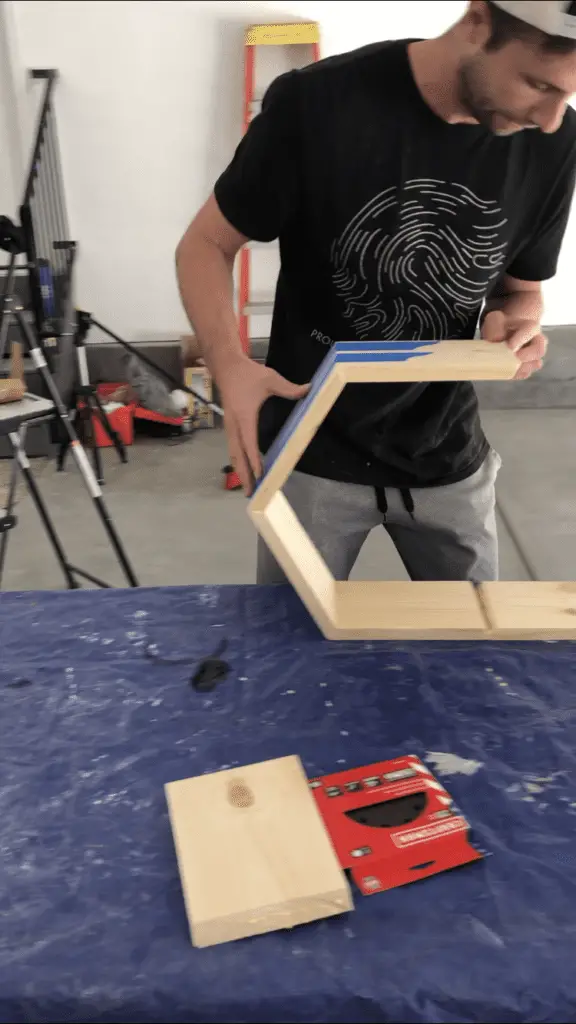
Step 3. lay all the pieces of wood down in a row and tap the back side of the boards like the picture below. Then flip the boards so the tape is on the bottom and your 30-degree cuts are face up.
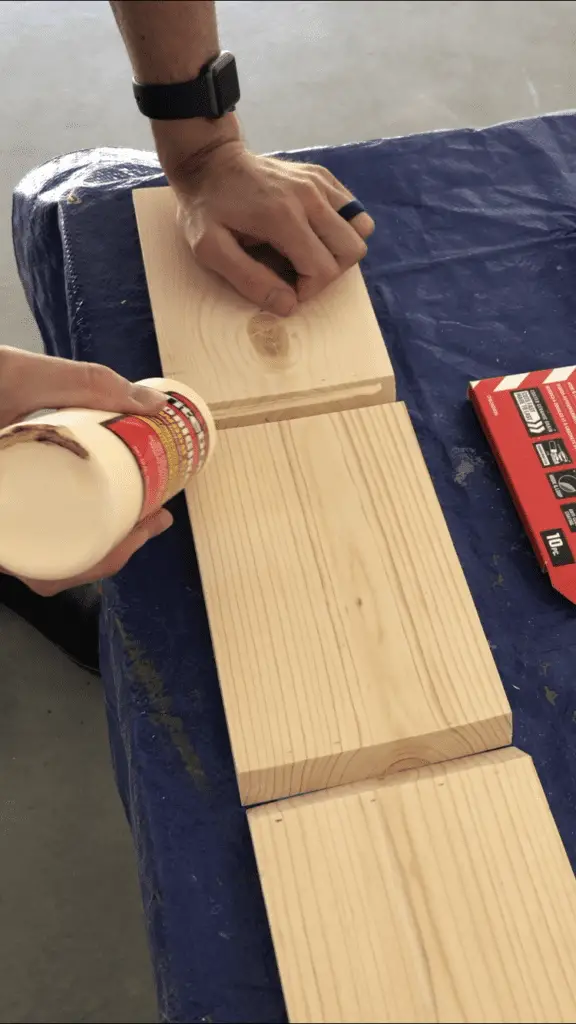
Step 4. Apply glue in all the joints.
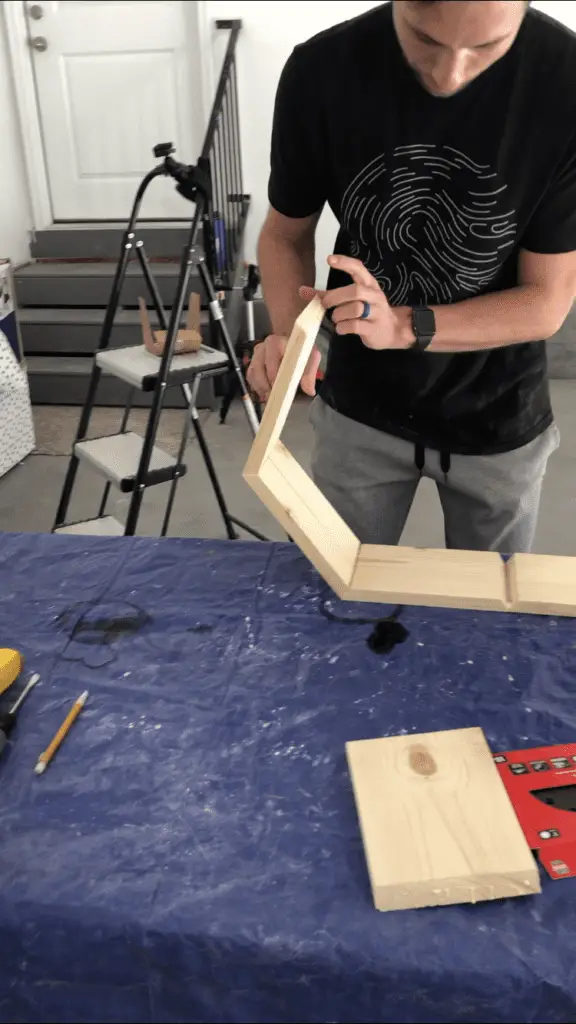
Step 5. This part is oddly satisfying. grab one end of you tape together boards and start rolling the up together. Once you have all the pieces together wrap the hexagon in tap or use clamps to make sure all the joints that have glue stay touching. Now that everything is in place I took a few brad nails and shot them into each of the joints for each support and strength. Make sure to wipe away all the excess glue off the joints.
Step 6. Once all the glue is dry, I then did another round of sanding. After sanding be sure to wipe away all the dust. Now that the dust is all gone it is time to stain.
Step 7. Give the stain at least 24 hrs to dry then use saw tooth hangers to attache your shelve to the wall.