Our kitchen island was just about as boring as a kitchen island can get. We decided to make it less boring by adding a little shiplap. We didn’t want something that was super “loud”, but instead something a little more subtle. Hence why I say we made our kitchen Island a little less boring, so we are making a step in the right direction. 🙂 This project is super beginner-friendly and very affordable.
Tools and Supplies Kitchen Island Makeover With Shiplap
Supplies
- MDF panels 1′ x21/2’x8″ (This is the size I used, you can you whatever size fits your style)
- Shiplap
- Caulk
- Spackle
- Paint
Tools
- Brad Nailer
- Jig Saw
- Miter Saw or Circular Saw
- Level
- Sand block
- Paint roller
- Paintbrush
Kitchen Island Makeover Steps
Step 1. Measure out the height and width of your kitchen island. This step is important to know how much supplies to buy.
Step 2. Cut MDF trim for the borders using a miter saw. You will need boards on all the edges of your island
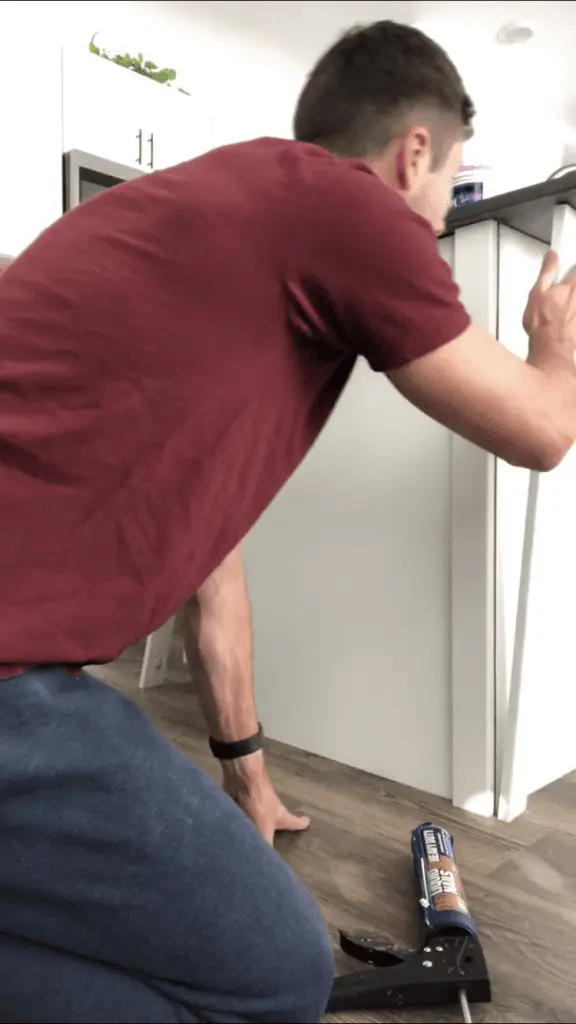
Step 3. Attach borders using liquid nails and brad nails. It is important to measure the depth of your kitchen island cabinets to make sure your brad nails don’t go through your island. My cabinets depth is 3/4 inch and the boards are 1 inch thick, so I used a 1 1/2 inch brad nail for my boards. Apply the liquid nails first and place the boards on the island, then shoot the brad nails into the board.
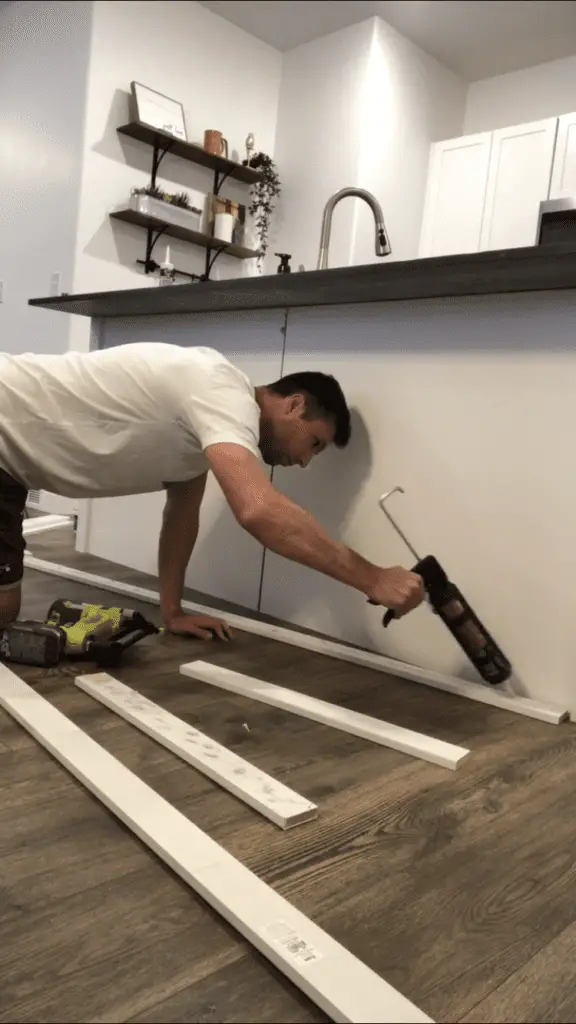
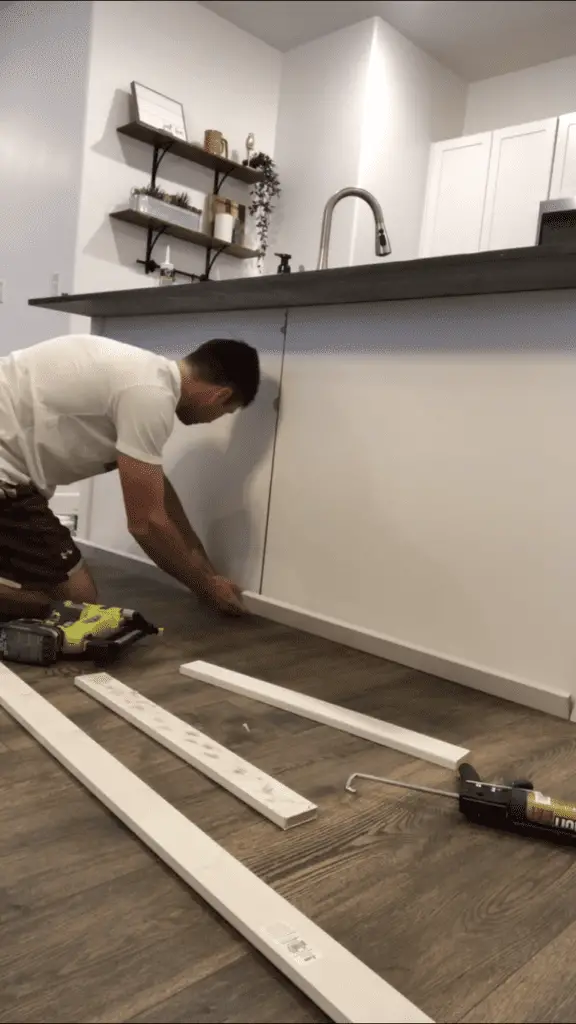
For the corners, I used MDF board on each side with one hanging out 1 inch so you can line up the other side for a clean look. I did have an outlet in my way on one side when I was adding the border, so I had to use a jigsaw to cut the board to go around the outlet.
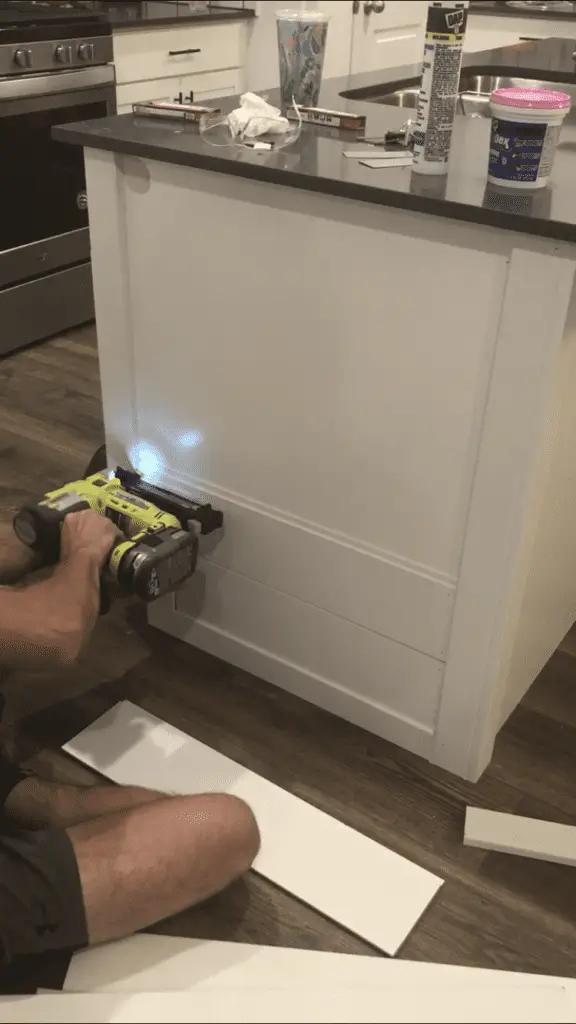
Step 4. Now that you have the borders all done it is time to start cutting the shiplap. Get the cuts as close to the right length as you can. Don’t worry if you cut them a little too short, because you can use caulk to go back and make the lines look seamless.
Step 5. Hang up the shiplap with liquid nails and a brad nailer. Remember you might need to use different length nails than what you used for the MDF board depending on the depth of the wood of your kitchen island. Try your best to place the nails in the groove of the shiplap so you will have fewer holes to fill in later. This is something that I learned the hard way.
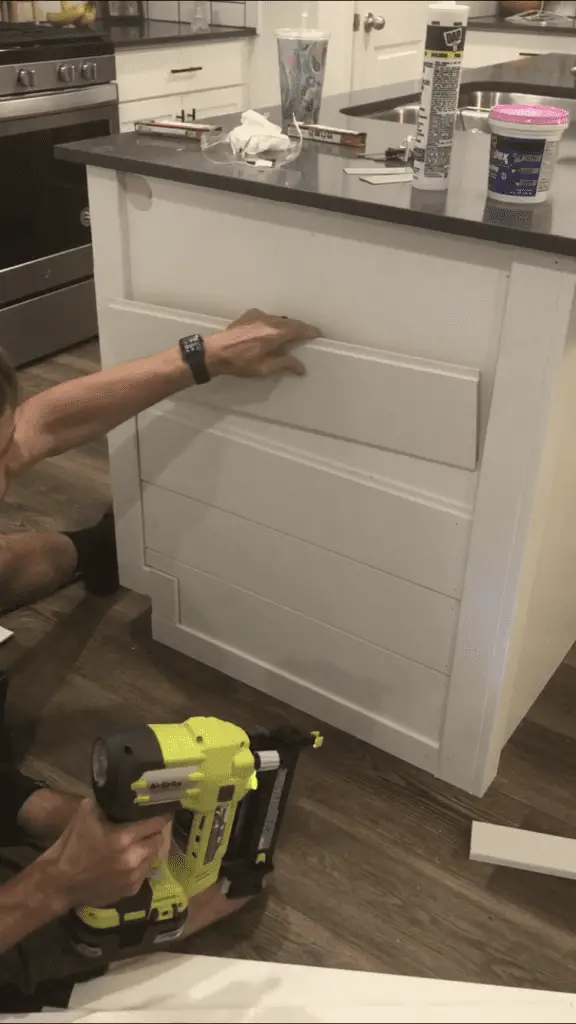
Step 6. Caulk all the seams where shiplap hit the MDF boards. Then use spackling or wood filler for all the seams on the border.
Step 7. After the wood filler or spackling is dry do a bit of sanding to give it a smooth finish. Repeat steps 6 and 7 as many times as you need to get the look you want.
Step 8. I know the MDF and shiplap are already white, but after working with them they get a little dirty and a fresh coat of paint does make a huge difference.
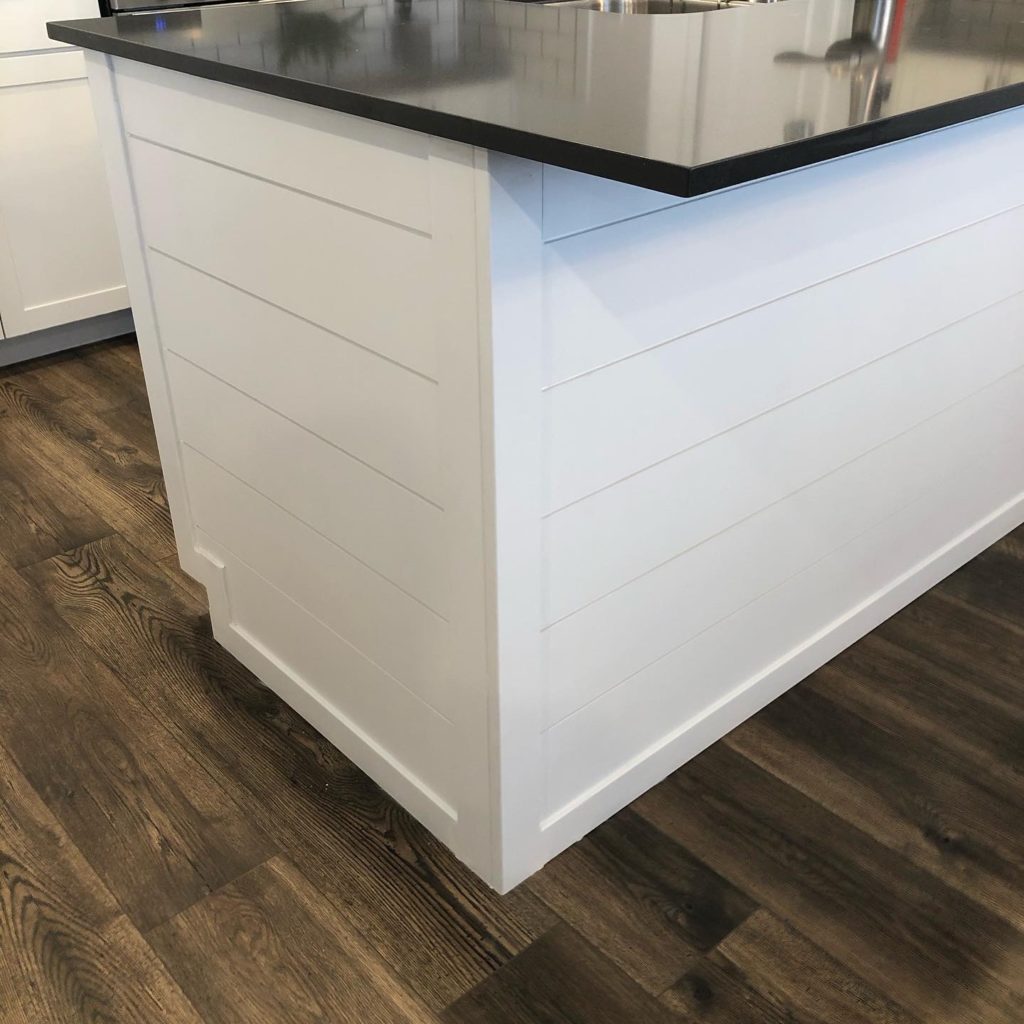
Now you have a beautiful kitchen Island and you did it all by yourself.