Christmas Silhouette DIY Projects for Festive Decor
Are you ready to spread some holiday cheer and add a personal touch to your Christmas decorations? Look no further! A DIY Christmas silhouette is an easy way to transform your home into a dazzling winter wonderland. With endless design possibilities and a sprinkle of creativity, you can create stunning decorations that capture the essence of the season.
In this blog post, we’ll walk you through the process of designing, cutting, and assembling your very own Christmas silhouette decor. Whether you’re a seasoned DIY enthusiast or a beginner looking for a fun and engaging project, these easy-to-follow steps will have you decking the halls with your custom silhouettes in no time! I do want to say that is was inspired by this post by Barbarella Home to create these silhouettes so I would highly recommend checking out her post as well
Choosing the Perfect Christmas Theme for Your Silhouette DIY
Inspiration for your silhouette design can be found on platforms like Google and Pinterest, or you can transfer images onto wood using a projector or grid method. With so many fun ideas and resources at your fingertips, the hardest part might be narrowing down your favorites! So, gather your materials, put on your favorite Christmas playlist, and let the decorating begin.
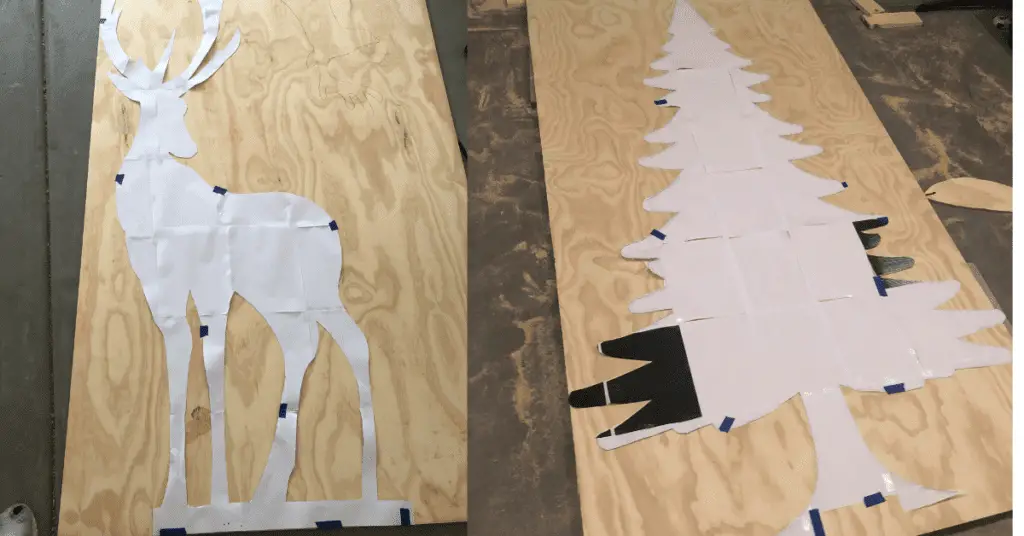
I opted to make my design in Canva and then print it out like a puzzle piece because I didn’t have a projector. I don’t recommend going this route. It took so much time and ink to print the design and even more time to cut and tape it together. It would have been much easier to use a project to trace the design on the wood.
Remember, your chosen design should not only be visually appealing but also simple enough to cut out and assemble. With a bit of planning and creativity, you’ll quickly have a stunning silhouette that adds a touch of magic to your holiday decor.
Trace Your Design on Plywood
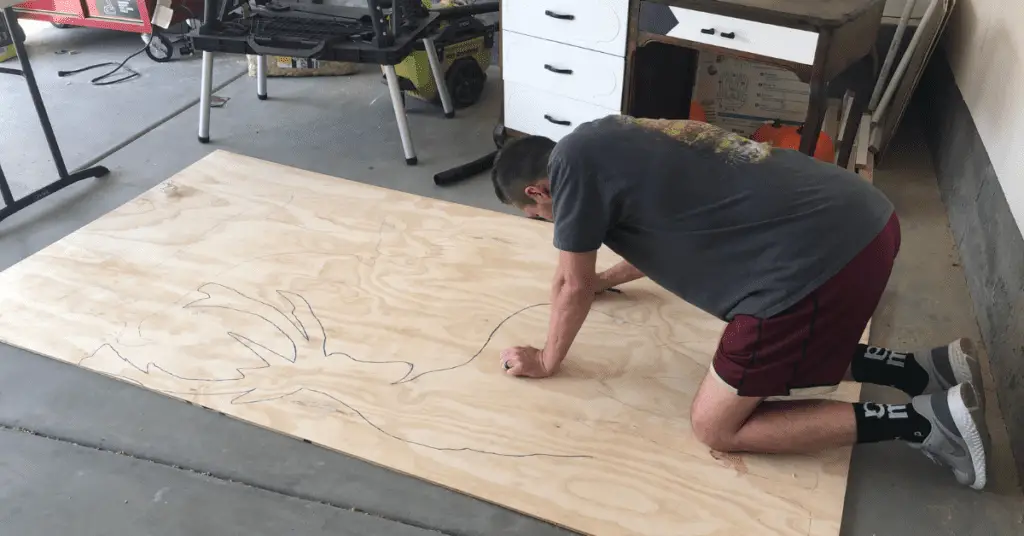
After finding the perfect design, the next step is to bring it to life. Start by tracing your chosen design onto a suitable plywood surface, such as outdoor MDF plywood or green treated outdoor plywood. These types of plywood are durable and can withstand outdoor conditions, especially when painted with outdoor paint.
To trace your design, you can use a projector to display the image onto the plywood surface, and then trace it using a pencil or other art supplies. Alternatively, you can use the grid method by drawing equally spaced lines on both the plywood and design image, making it easier to transfer the design accurately.
Once your design is traced, make sure the lines are clear and easy to follow, as this will ensure precision and accuracy during the cutting process. With your design in place, you’re now ready to move on to the next step: cutting out your silhouette.
Cut Out Your Silhouette
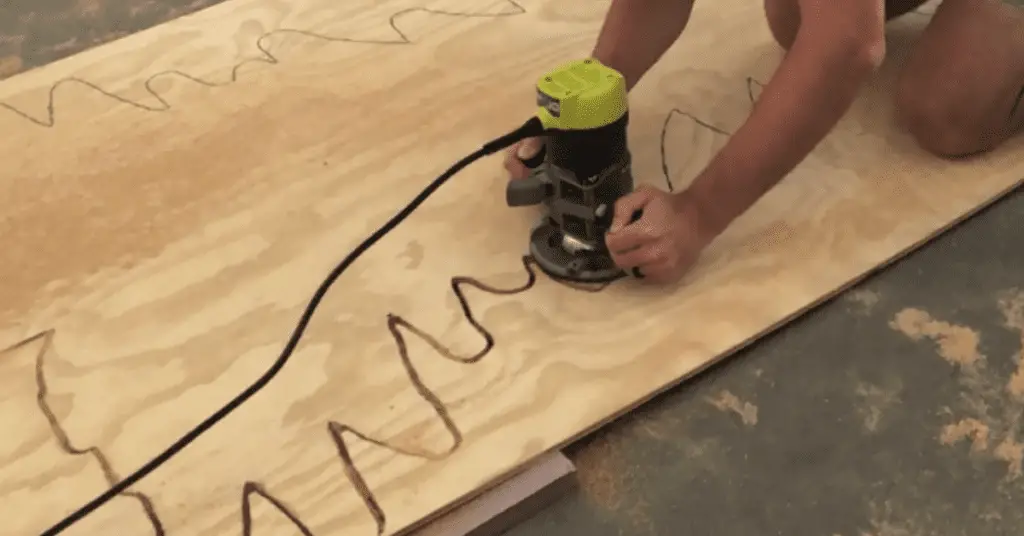
Having traced your design onto the plywood, the next step is to give life to your Christmas silhouette by cutting it out. A Dremel tool or plunge router is perfect for this task, as they offer excellent control and precision. If this is your first time using these tools, don’t worry – with a bit of practice, you’ll be a pro in no time!
Before you begin cutting, make sure to follow these steps:
- Mark your cutting lines clearly on the material.
- Secure the material firmly in place.
- When cutting delicate areas take your time.
- Grip the tool firmly but let the weight of the tool be the only pressure applied.
- Cut in one direction, preferably pulling the tool towards you.
Sanding
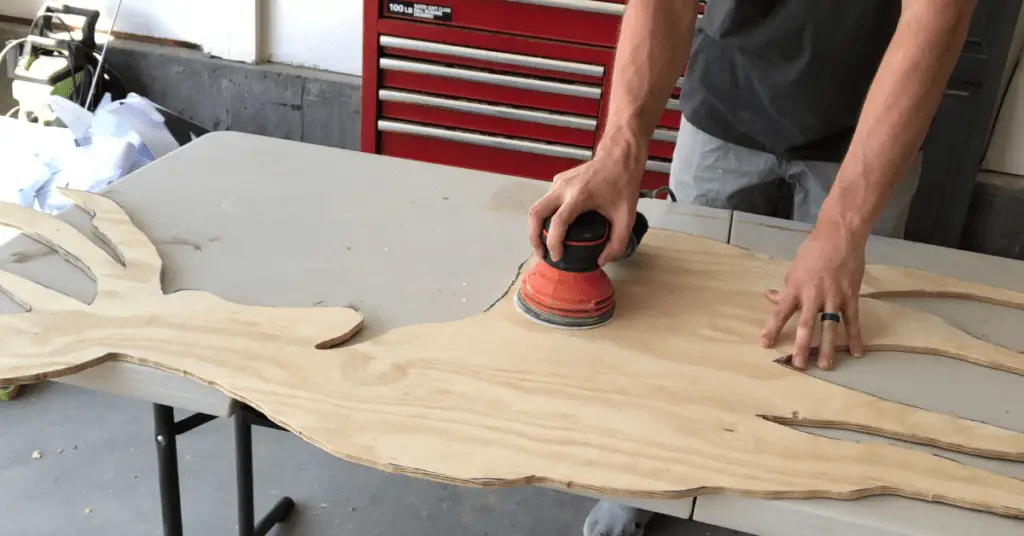
Once the silhouette is cut out, the edges need to be smoothed to create a polished finish. For this step, you’ll need:
- 180-grit sandpaper, which is the perfect coarseness for smoothing plywood edges
- Coarse grit sandpaper to quickly tackle any rough areas
- Finer grit sandpaper, such as 220 grit, for a smooth finish
- It is optional to have an orbital sander, but I would recommend one.
After smoothing and refining the edges of your silhouette, it’s time to add some color to your creation with some paint
Paint
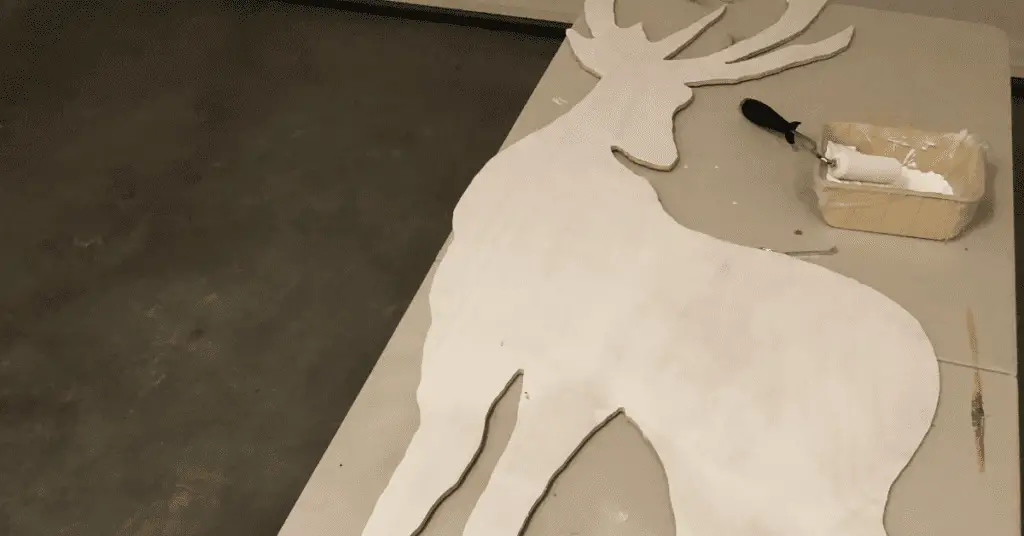
Painting your silhouette not only adds a layer of protection but also enhances its visual appeal. For this step, use a high-quality, weather-resistant paint, such as BEHR PRO, to ensure durability and longevity. Flat black paint is an excellent choice for creating a stunning silhouette that stands out against your festive decor.
To apply the paint, follow these steps:
- Start by applying a coat of low solids clear vinyl sealer to the plywood.
- Follow this with two thin coats of the paint of your choice
- Sand lightly between each coat with super-fine grit sandpaper and wipe off any dust.
Allow the paint to dry completely between coats, following the manufacturer’s instructions for drying time. With your silhouette fully painted and looking fabulous, you’re now ready add some sparkle with lights.
Glue Lights To Your Silhouette
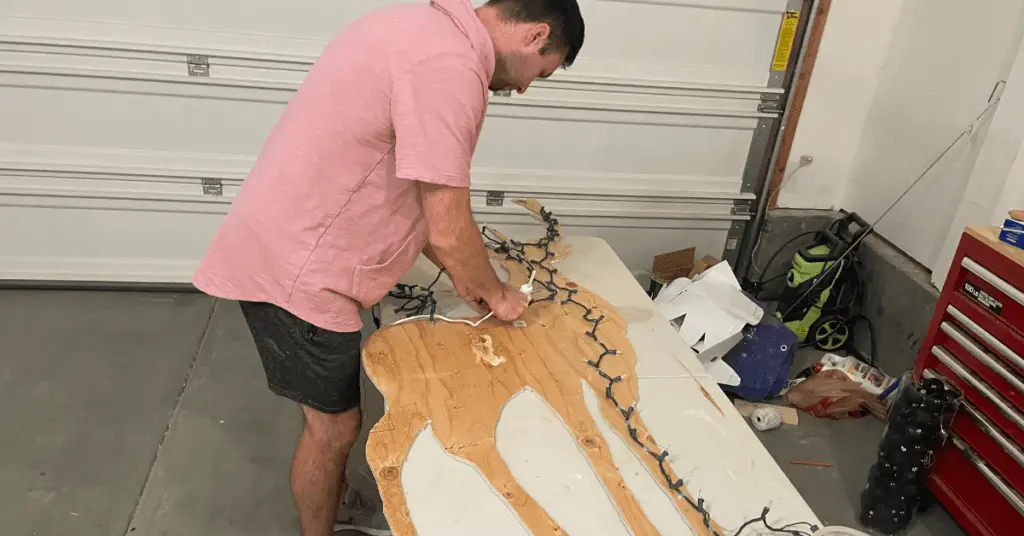
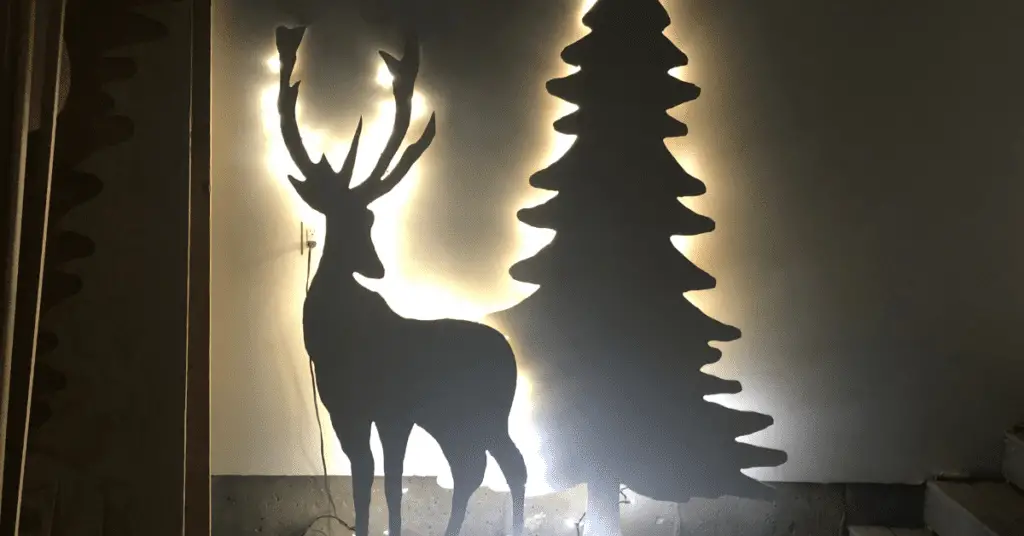
Illuminating your silhouette with lights not only adds a touch of enchantment to your decor but also brings your creation to life at night. Outdoor Christmas string lights are the best options for this task, as they’re small, flexible, and come in various colors that can create a magical effect.
To attach the lights to your silhouette, use hot glue on low heat, which works incredibly well and can be easily removed if needed. Ensure that the lights are strategically placed along the edge of the back of the silhouette, with each bulb hidden from direct view. This will make your masterpiece look professional and polished.
When the lights are securely attached, the next step is to add the finishing touches to your silhouette by painting it with weather-resistant paint.
Attached silhouette to your base
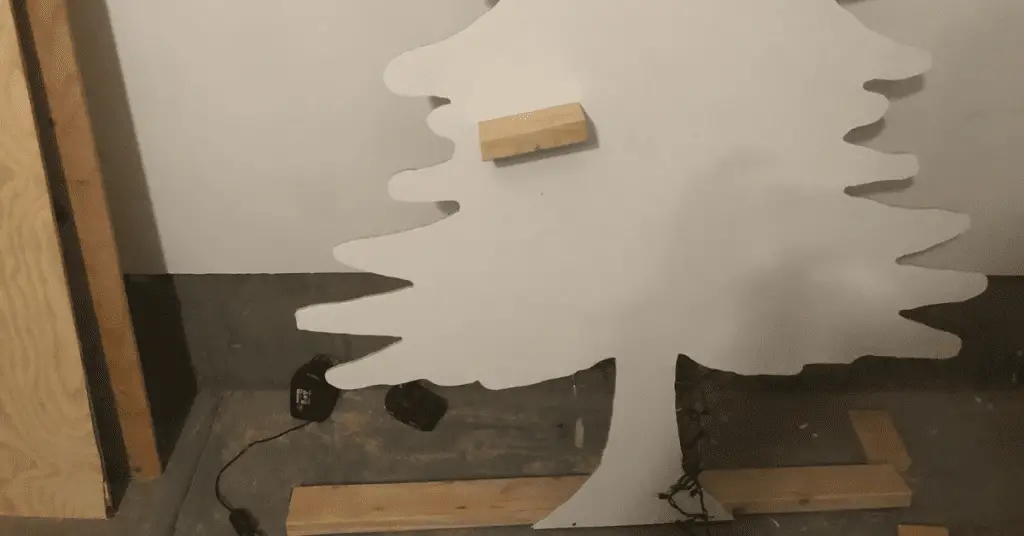
After completing your Christmas silhouette DIY project, the next exciting step is to display it! Here are some tips for displaying your silhouette:
- Attach your silhouette to a sturdy base I used 2x4s for this, but you can many different things
- Consider using hot glue for extra security.
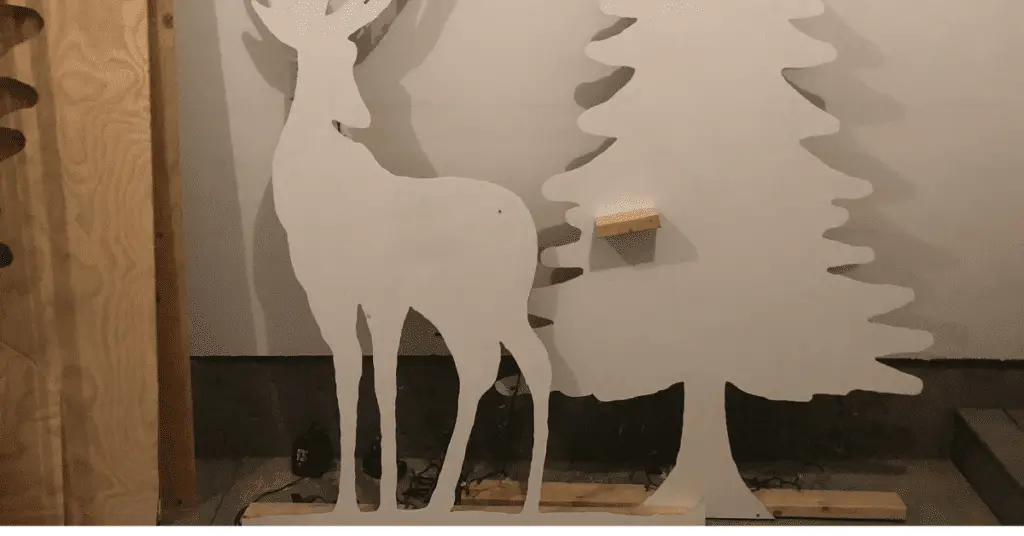
Get creative with your holiday decor by incorporating your silhouette into various festive settings, such as your front yard, porch, garage or even in door somewhere.
Your one-of-a-kind silhouette is sure to be a conversation starter and a cherished addition to your holiday decor for years to come, especially when you hang it in the perfect spot, like near a tree.
Summary
In conclusion, Christmas silhouette DIY projects are a fun and engaging way to add a personal touch to your festive decor. By following the steps outlined in this blog post, you can transform ordinary plywood and lights into stunning decorations that capture the spirit of the season.
So, gather your materials, unleash your creativity, and embark on a festive journey that will fill your home with holiday cheer and create lasting memories with your loved ones. Happy decorating!