Do you want to add some extra style to your home but don’t want to spend a lot of money? A DIY wood slat wall is the perfect solution! This blog post will show you how to build your own wood slat wall with minimal tools and supplies. We’ll go over everything you need to know, from picking the right wood to attaching the slats. So get ready to add a touch of rustic charm to your home!
Supplies Needed For Slat Wall
- Wood – 4×8 sheet of plywood or 1×2 select pine
- Stain
- Paint
- Polyurethane
- Wood filler
- Blue tape
Tools Needed For Slat Wall
- Brad Nailer
- Tape Measurer
- Miter Saw or Circular Saw
- Level
- Paintbrush/ Roller
- Orbital Sander
Step 1: Decide What Wood You Want To Use
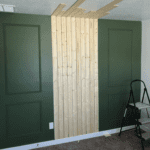
Option 1: There is a cheap way to do this and a fast(er) way to build a slat wall. The cheaper way is to buy a 4’x8′ sheet of plywood and cut it into 1×2 slats using a table saw or circular saw. The downside to this is of course it is going to take more time.
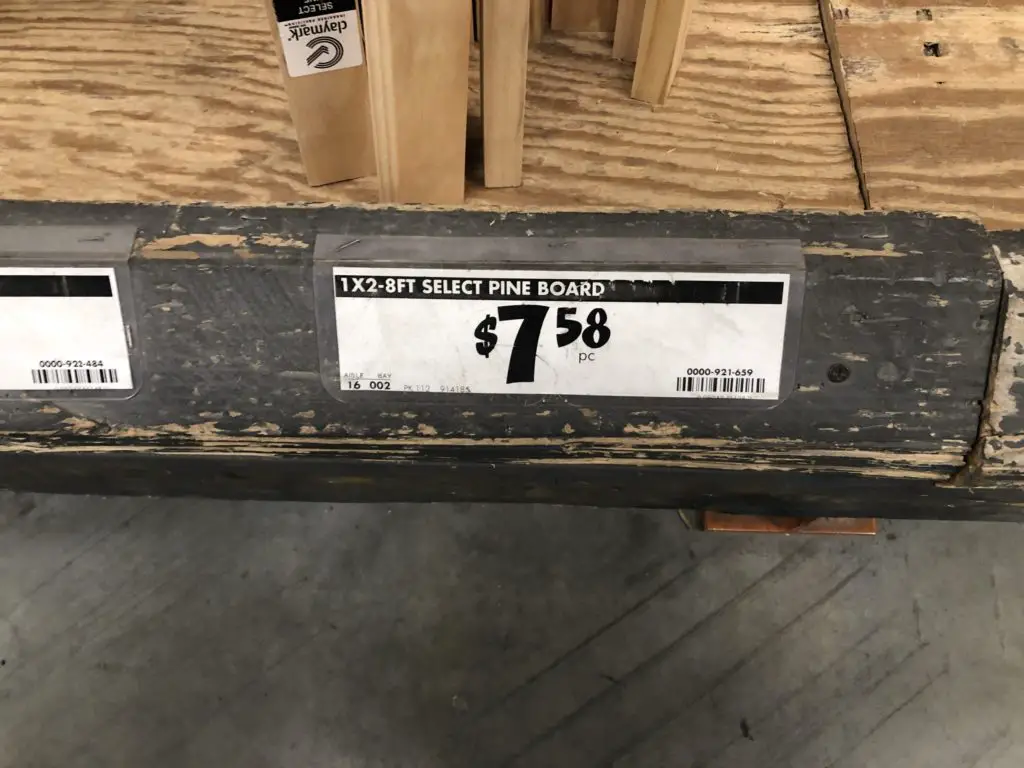
Option 2: I decided to go the faster route and by using select pine 1x2s, I went with these because they are (mostly) straight and (mostly) smooth. So I didn’t have to do very much sanding and of course, I didn’t have to make long cuts with a table saw. I got my wood from The Home Depot for $7.58 each (before tax).
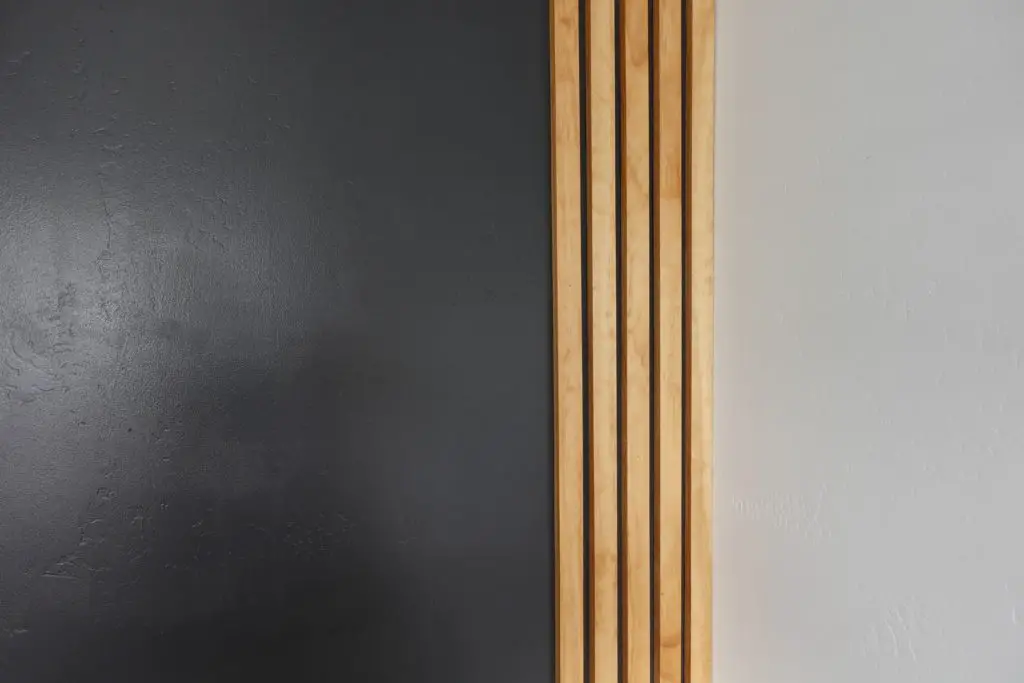
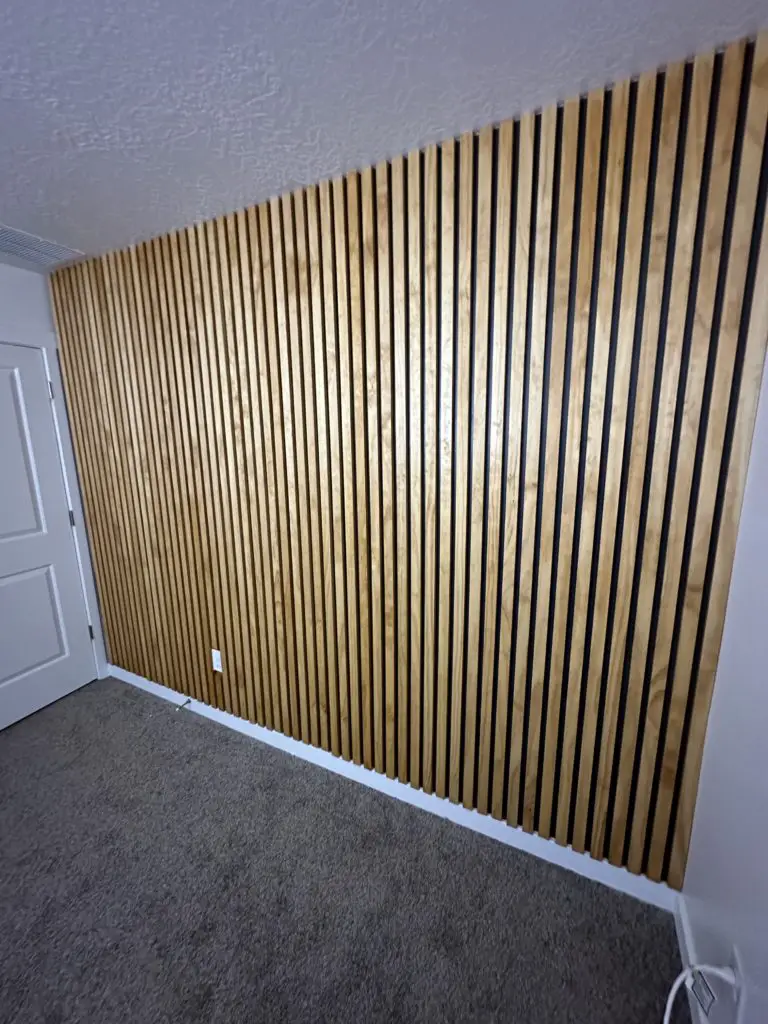
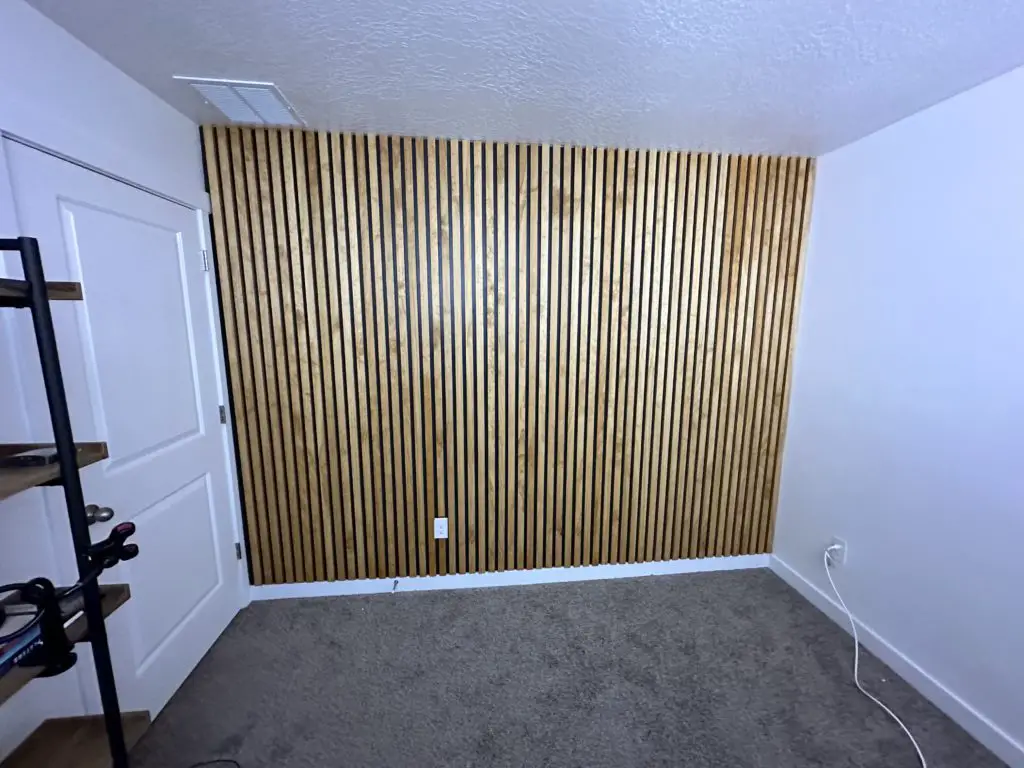
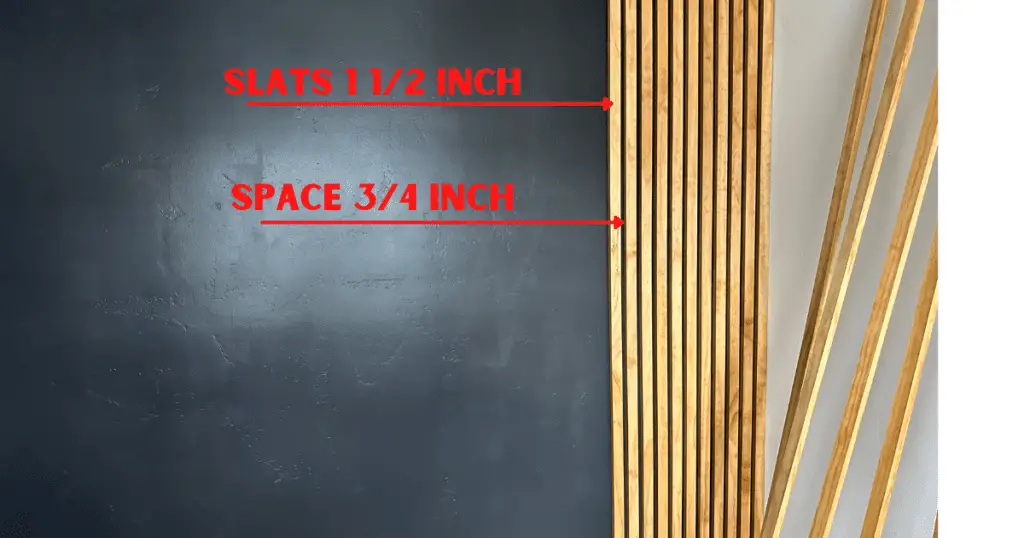
My wall is 10 feet wide and I did a 1×2 (which is actually only a 1 1/2 wide) and a 3/4 inch space between each slat so the width of each slate is 1 1/2 inch plus the 3/4 inch space gives me 2 1/4 inch wide per slate. If I take the 2 1/4 inch and divide it by 10 feet (120 inches) that gives me 55 slats that I need for my wall. Which brought the total bill for the wood to around $416. So yes, it was more expensive, but to me it was worth not having to do all the extra cuts and sanding.
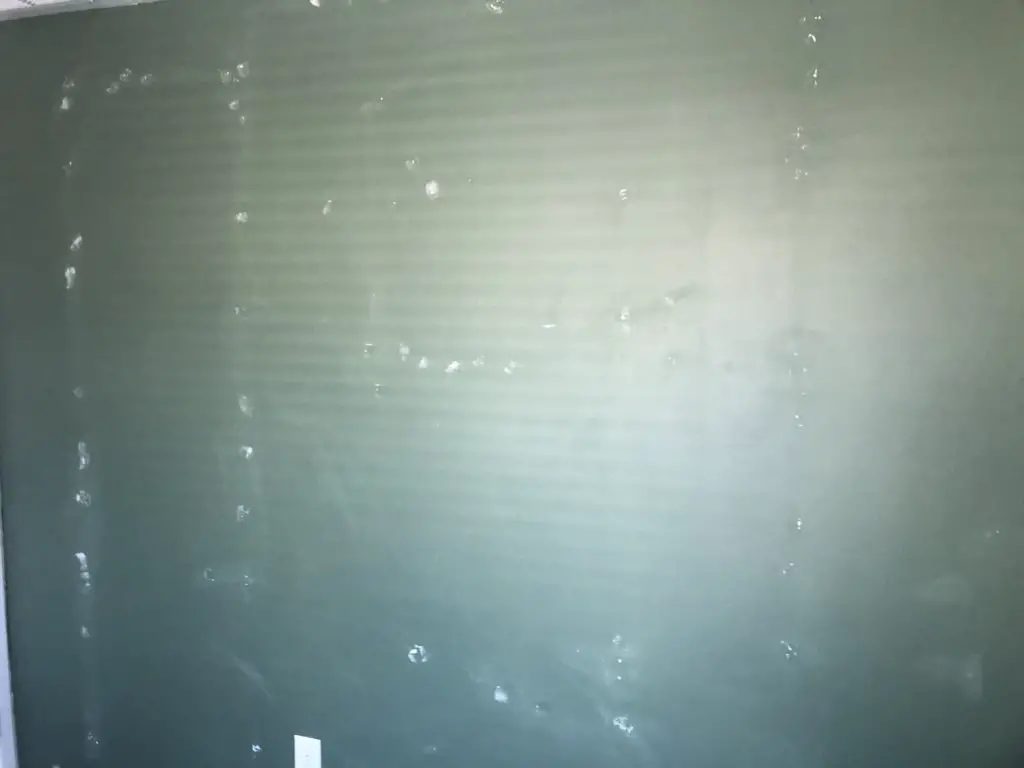
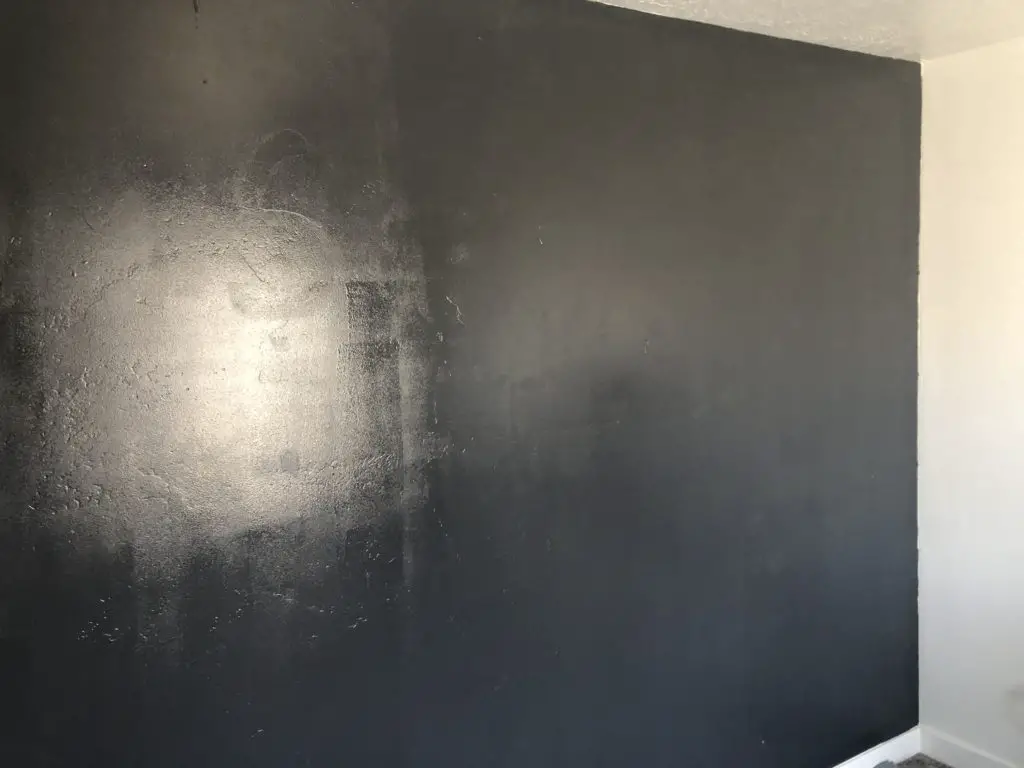
Step2: Prep Your Wall For Paint
Before you start attaching your wood slats to the wall you’ll want to prep the area first. This means removing any nails or screws, sanding down any rough spots, filling in holes, and cleaning the wall with a damp cloth. Once your wall is prepped, you can move on to painting.
Step 3: Paint
Now it’s time to paint your wall! You can use any color you want, but I recommend using a dark color so that it doesn’t clash with the wood slats. Depending on your spacing between the slats you will be able to see the color, so keep that in mind. For my wall, I decided to go with the classic cracked pepper by Behr.
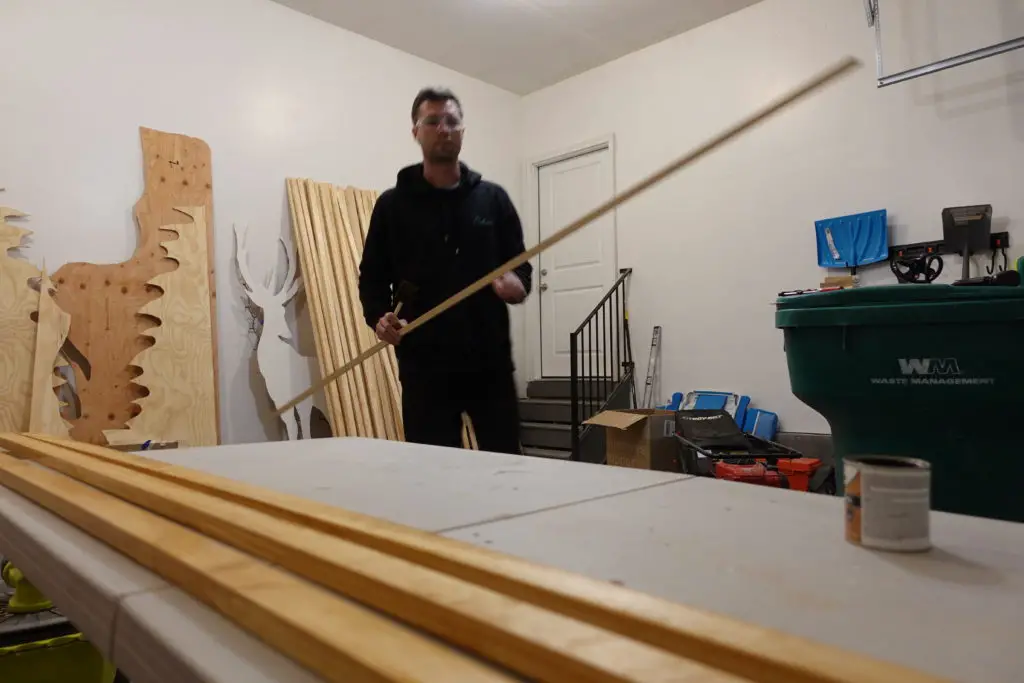
Step 4: Measure And Cut Slats
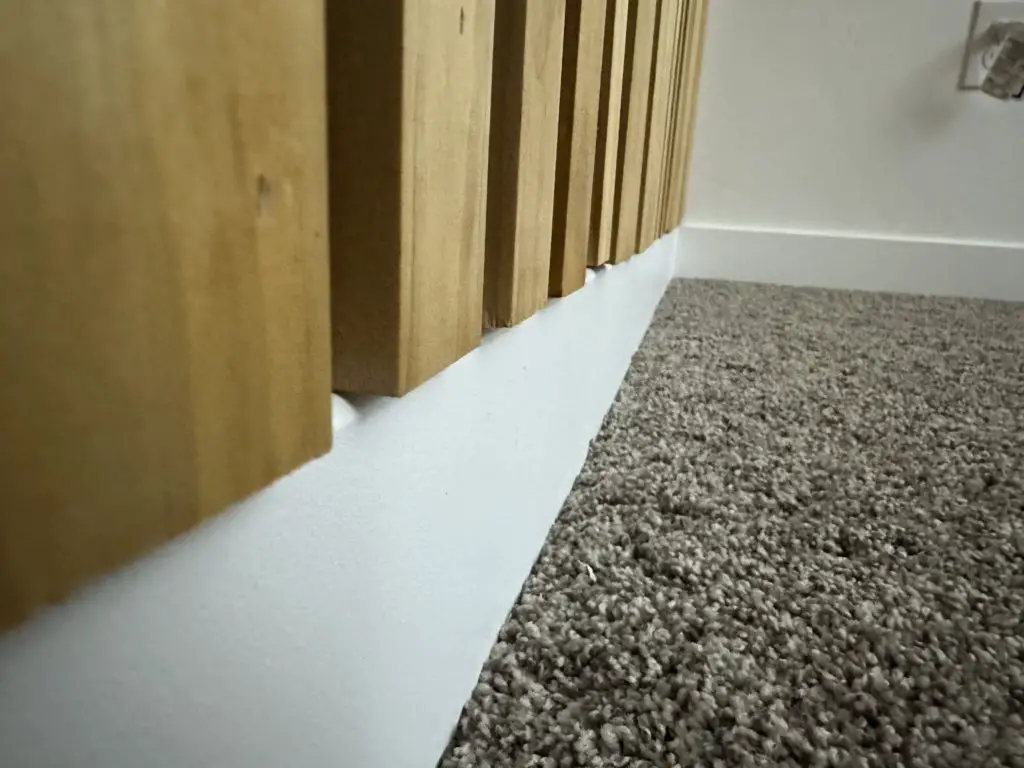
My wall is 8 feet tall but I decided to keep my baseboards installed, to from the baseboard to the ceiling was 92-93 inches (my ceiling is level) so the height varied depending on what side you were on. Because of this, I did have to cut a few inches off of each wood slat so it would fit.
Once all the wood slats are cut I did do a little sanding, but because the wood I bought was already sanded smooth I only gave them a lite sanding with 220 grit sandpaper, depending on your wood you might need to do more.
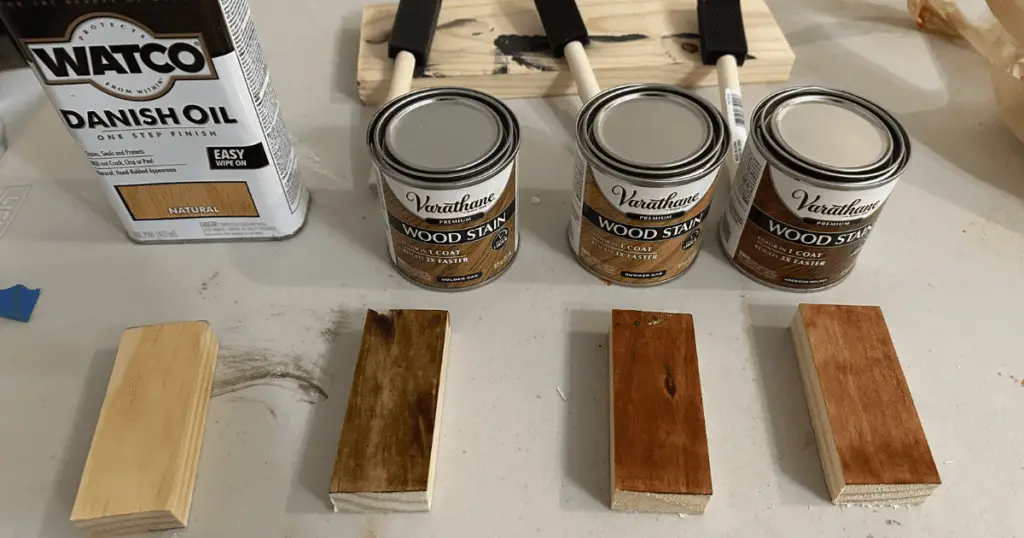
Step 5: Stain Wood
If you want to add a little bit of color to your wood slats you can stain them before attaching them to the wall. I decided to go with the summer oak stain after doing a test with a few different colors, but you can use any color you want. Just make sure you test the stain on a scrap piece of wood first so you know.
Step 6: Seal Slats with Polyurethane
After you have your wood slats all cut, sanded, and stained (if you choose to do so) it’s time to seal them. I did 1 coat of polyurethane on each side of the wood just to be safe. I would recommend getting a stain that allows you to get away with having to only do 1 coat of polyurethane, trust it will be worth the extra couple of bucks given the time you will save.
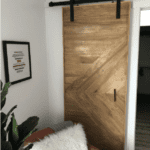
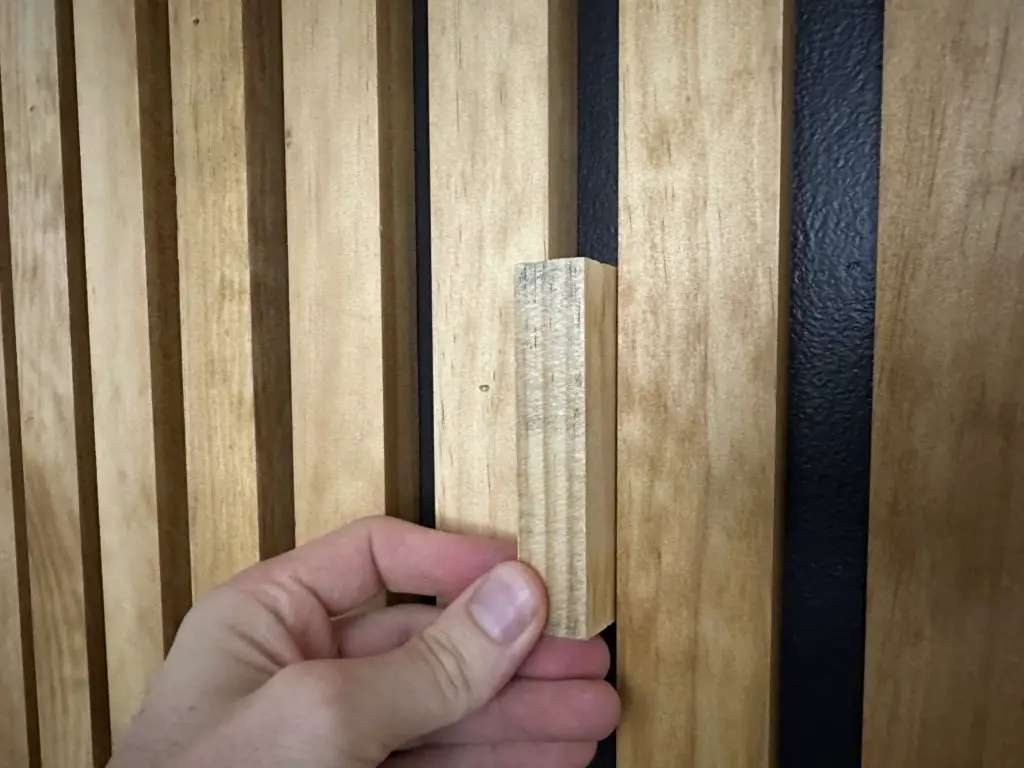
Step 7: Attach wood to wall
Now it’s time to attach the wood slats to the wall! I used my brad nailer for this which I highly recommend. You could also add some sort of adhesive like liquid nails to the back as well if you wanted, but I decided not to because I found the brad nails we holding the slats without the adhesive. I started on the right side and one by one added a slat to the wall. I used a scrap piece of wood as a spacer to keep the spacing constant. It would be helpful to have two people for this part, but I didn’t have that luxury for this project, so I did it solo.
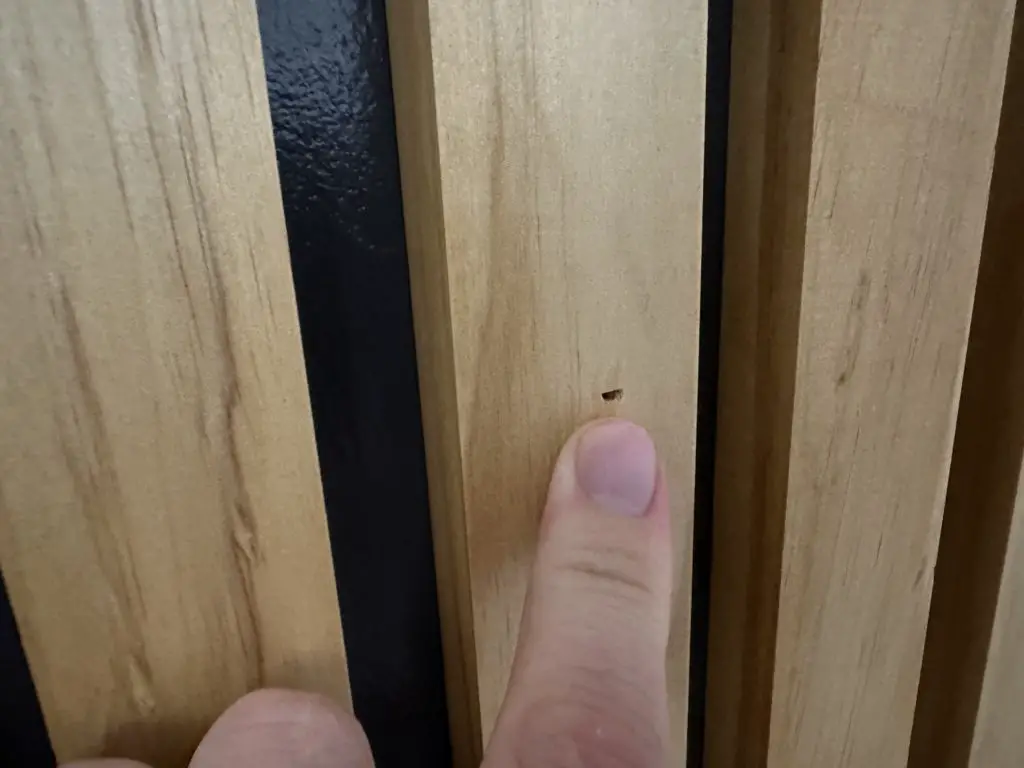
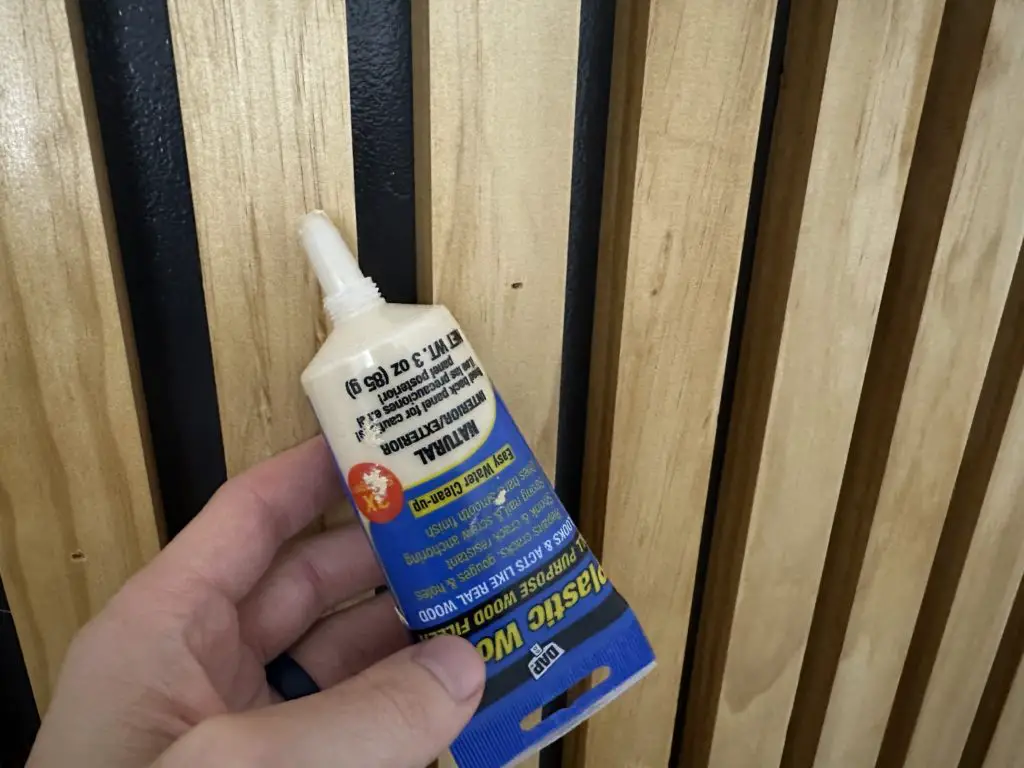
Step 8: Fill In Nail Holes
The brad nails will leave very small holes that you can fill in using wood filler. This can be kind of a tedious task but, depending on your preference it can really give it a clean look. So people however do like to leave the holes for a more rustic look.
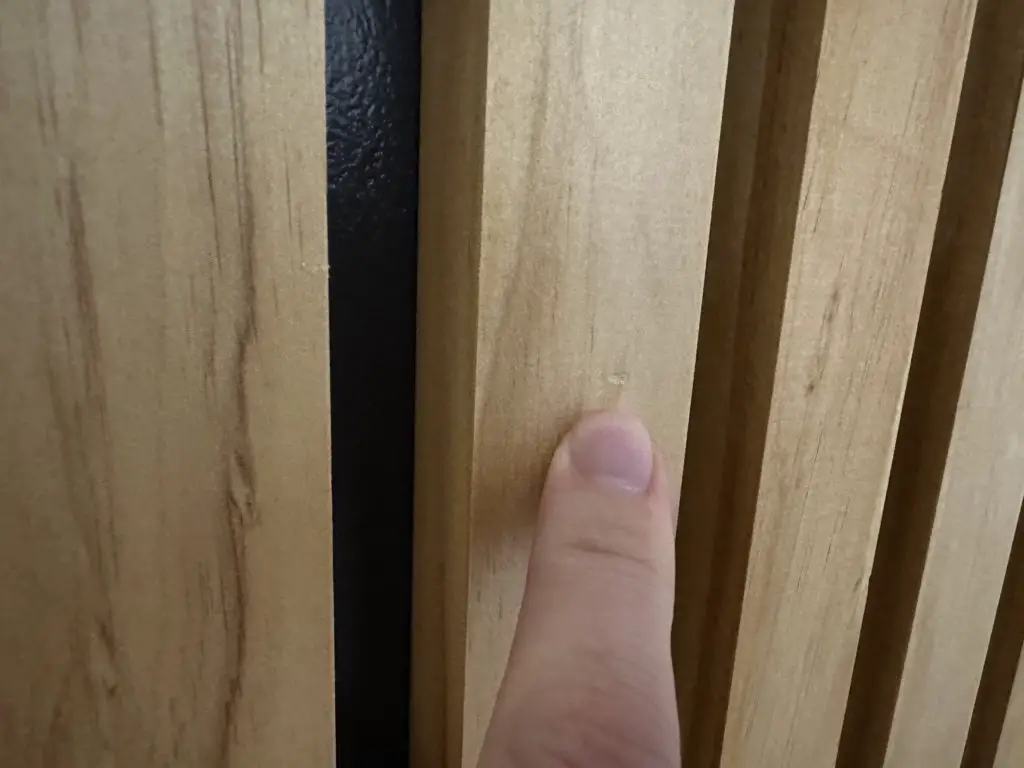
Step 9: Touch Up Holes With Stain (optional)
If you did fill in the holes with wood filler you will most likely want to give the holes a lite sand and touch them up with a little bit of stain.
Common Questions when building a slat wall
Q: What should I do about my outlet?
A: You can frame around the outlet using the same wood, or you could take the easy route like I did and just cut the wood at a 45 degree angle.
Q: How wide should the wood slats be?
A: The wood slats can be any width you want! I went with 1 1/2 inch wide slat, but you could do wider or thinner depending on your preference.
Q: What type of wood should I use?
A: For this project I used simple pine boards from Home Depot, but you could use any type of wood you want. Just make sure it’s sanded smooth so you don’t have to do a lot of extra work. It
Q: How far apart should the wood slats be?
A: The wood slats can be as close or far apart as you want! I went with a 3/4 inch wide space, but you could do more or less depending on your preference.
Q: Can I use a different type of paint?
A: Yes! You can use any type of paint you want. Just I would just make sure it’s a dark color so that it does clash with the wood slats.
Q: Do I have to use wood filler?
A: No, you don’t have to use wood filler if you don’t want to. Some people like the look of the holes, but if you want a more polished look then wood filler is the way to go.
Q: What do I do about my baseboards
A: You can either remove your baseboards or simply add the wood slats right over them. I chose to do the latter and it worked out just fine! There is a little bit of overhang, but it isn’t noticeable unless you are laying down and really looking at the base. You can also cut the bottoms at a 45-degree cut to prevent them from hanging of the baseboard.
Building a wood slat wall is a great way to add interest and texture to any room in your home. It’s a relatively easy project that can be completed in a weekend, and it’s also very affordable. Whether you choose to stain your wood slats or leave them natural, you’re sure to love the look of your new modern wood slat accent wall.